Dive into the world of spreadsheets with our simple guide on “How to Wrap Text in Google Sheets.” This nifty feature is a powerhouse for clarity, ensuring that not a single detail is lost in translation. By wrapping text, you can present your data confidently, keeping it neat and fully visible.
Google Sheets is a versatile tool for managing data, but text within cells can sometimes get cut off. To organize text, particularly comparison tables, some individuals use Google Sheets. You can quickly fix the issue via the “Wrap Text” feature.
In this article, we will explore what wrap text is, how to do it using a shortcut, and how to ensure your text fits perfectly in cells. We’ll also explore how to unwrap text in Google Sheets when needed.
Table of Contents:
- What is the “Wrap Text” Feature in Google Sheets?
- Why Wrap Text is Important?
- Issues When Text isn’t Wrapped
- How to Wrap Text in Google Sheets?
- Unwrapping Text in Google Sheets
- Tips on Managing Wrapped and Unwrapped Text
- FAQs
- Wrap Up
Let’s dive in!
What is the “Wrap Text” Feature in Google Sheets?
Definition: The “Wrap Text” tool in Google Sheets is magical for text inside cells. It automatically modifies the layout of your text to make it behave correctly. Wrap text perfectly fits within the cell, acting as a cover for your words rather than disappearing outside the cell’s borders.
Why Wrap Text is Important?
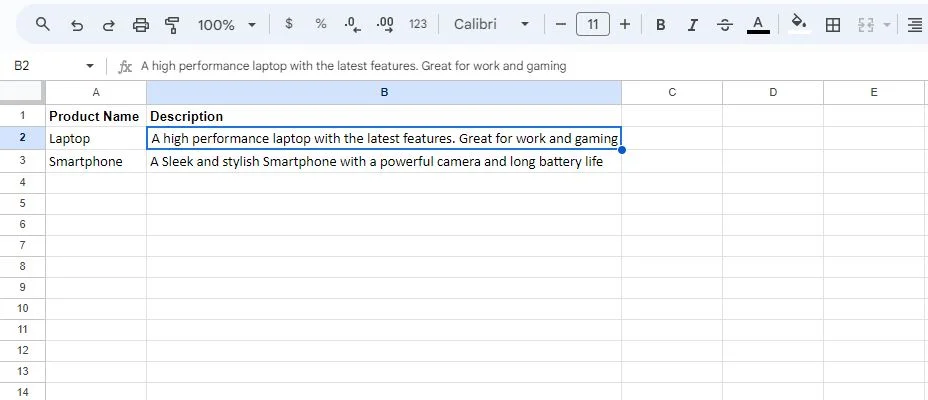
Wrap text is crucial because it ensures all your text is visible and easy to read. Imagine if you had a long sentence that’s too big for a single cell. Without text wrapping, you will only see part of it, and the rest will be hidden, which causes frustration and confusion.
Issues When Text Isn’t Wrapped
Sometimes Google Sheets wrap text not working so you may face a lot of problems. Several issues may arise if the text is not wrapped:
- Your spreadsheet may appear disorganized if the text doesn’t wrap around the adjacent cells.
- It can be hard for you to edit text that isn’t wrapped because you can only see a portion of the content simultaneously.
- Sheets that are neat and well-organized are essential for projects for work or school. Text that isn’t wrapped can give your work a less professional appearance.
How to Wrap Text in Google Sheets?
There are many methods that we discussed for how to wrap text in Google Sheets. Following are:
Method 1: Using the Shortcut for Text Wrapping in Google Sheets
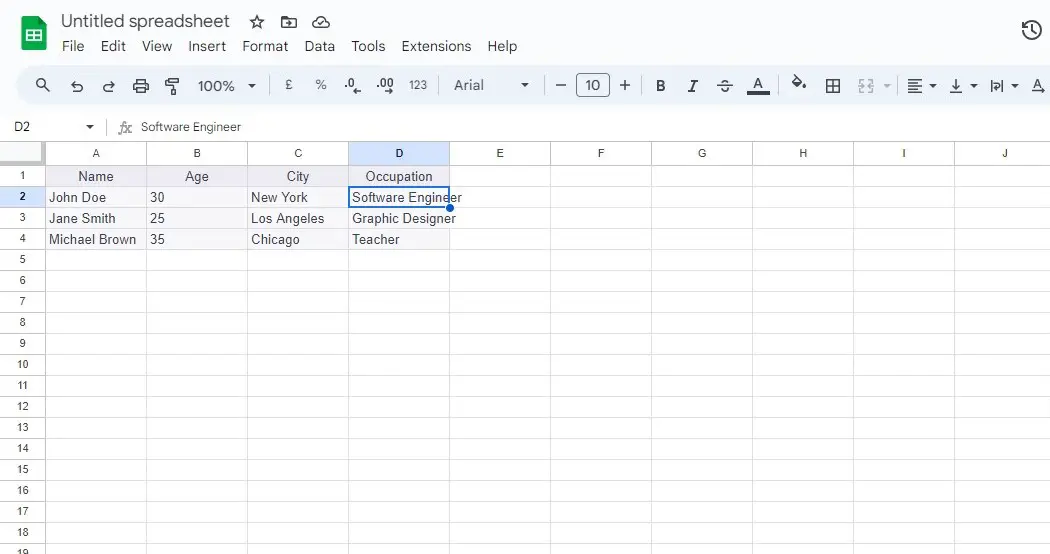
Imagine you need to rapidly wrap text in a cell while updating a Google Sheets document without using the menus. The quick method will save you in this situation. It’s similar to the text-wrapping.
The process of using this shortcut is simple for you; let’s now simplify it down into manageable parts to follow the below steps:
- First, open the Google Sheets document you’re working on. Ensure you’re looking at the cell where you want to wrap text.
- Tap on the cell that contains the text you want to wrap. It highlights the cell and tells Google Sheets where to work its magic.
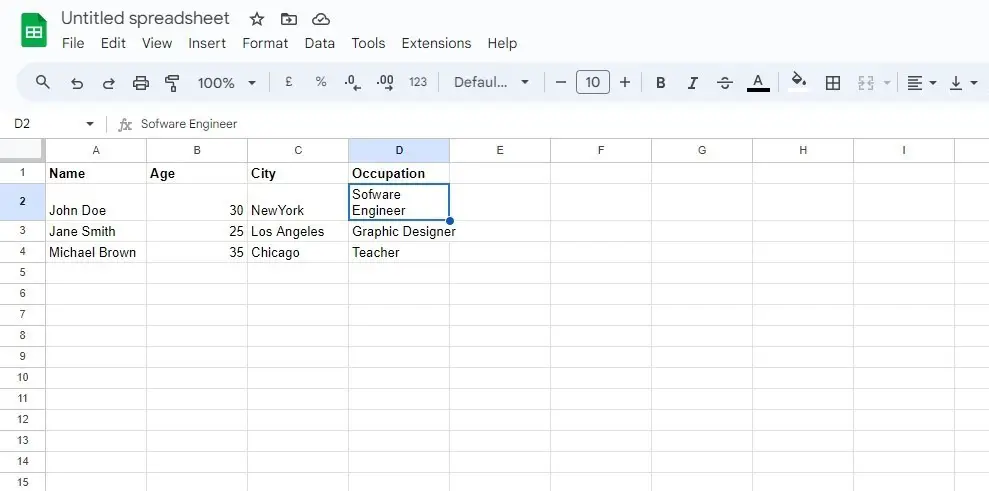
- Press the following keys together: Ctrl + Enter. Your text inside the selected cell will now be neatly wrapped to fit within the cell’s boundaries.
For example, we took a ‘graphic designer’ text to wrap in a cell completely.
- Take a moment to see how your text looks perfectly organized within the cell.
Method 2: Expanding Text to Fit in Cells in Google Sheets
Have you ever faced a situation where the text in a cell just doesn’t fit? It happens when the cell isn’t big enough to accommodate all your text comfortably. But don’t worry; we’re here to show you how to make Google sheet cells expand to make your text fit in cells.
Giving your text additional space to breathe within a cell is done by expanding cells to suit the text. Here is how to go about it:
- First, click on the cell containing the text that doesn’t fit. The cell will be outlined, indicating it’s selected.
- Move your cursor to the edge of the cell until it turns into a double-headed arrow. Then, click and drag the edge to make the cell bigger.
- As you resize the cell, keep an eye on the text inside. Make the cell large enough so that the text fits comfortably without spilling into neighboring cells.
- Once you’re satisfied with the cell size, release the mouse button. The cell will now be larger, and your text should fit perfectly.
Method 3: Create a Keyboard Shortcut to Wrap Text Using Macros
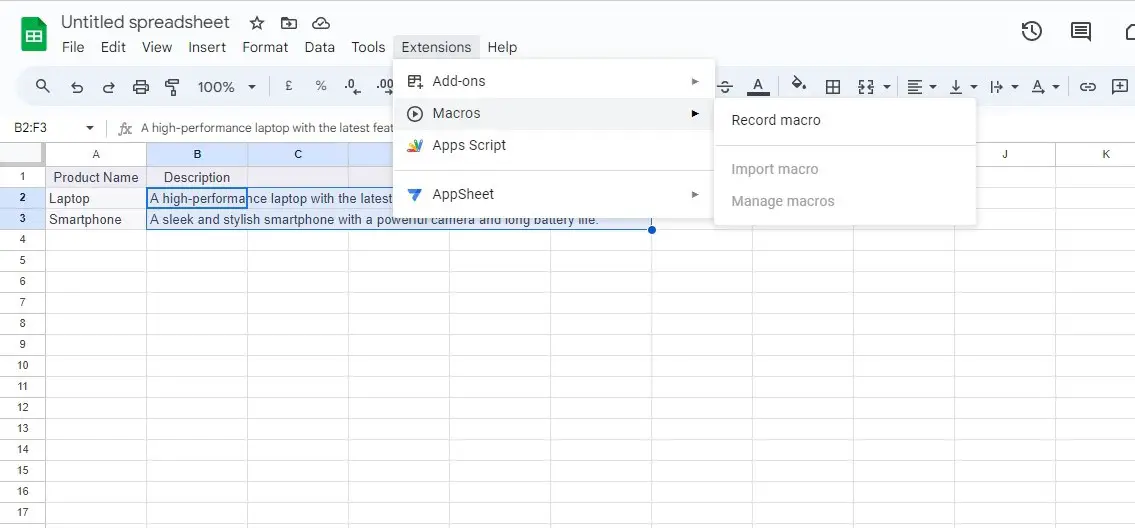
You can use macros to design a unique shortcut for text wrapping in Google Sheets. Here is how to wrap text using Macros:
- Firstly, choose the cells you want to wrap. Select Macros > Record macro from the Extensions menu in the top navigation.
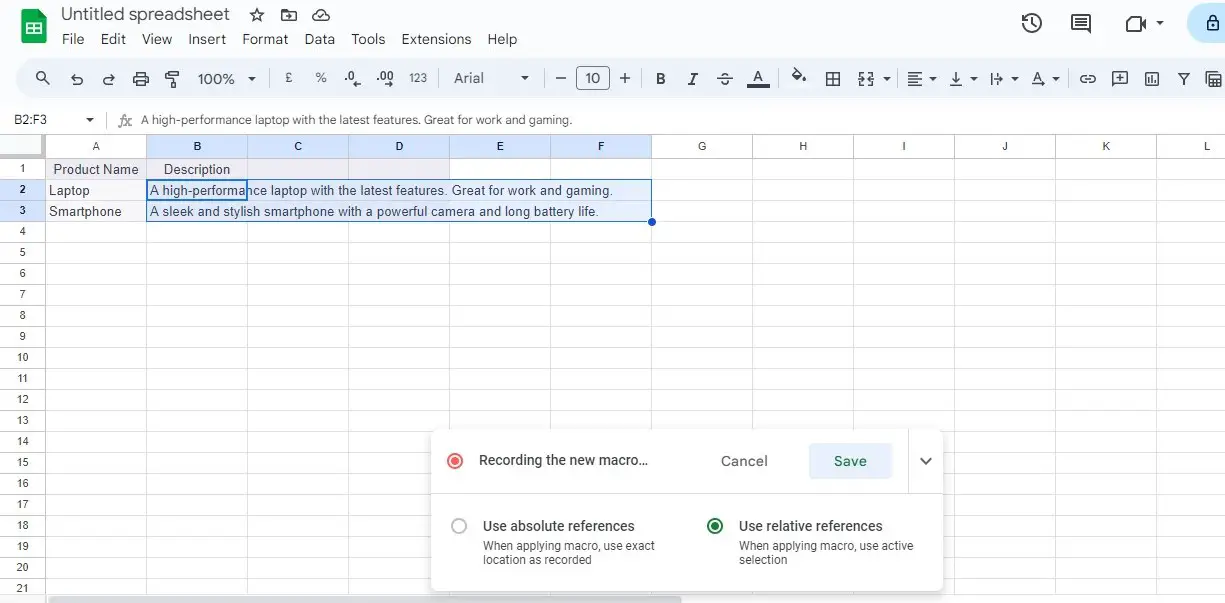
- Use relative references and your text-wrapping technique. To save the action, click Save.
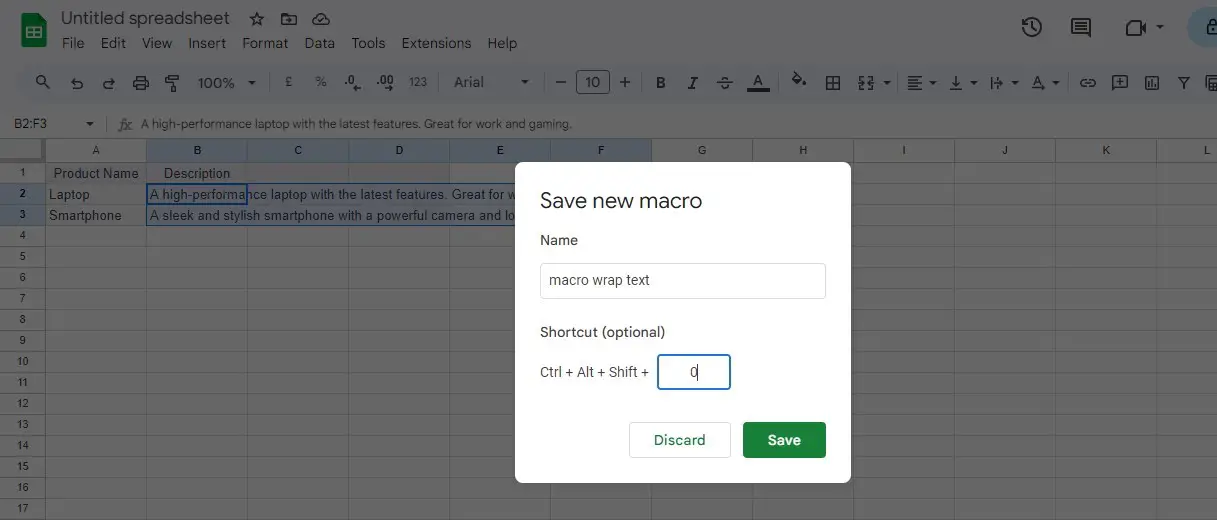
- Give your macro a name, choose a shortcut key (zero or one), and then click Save.
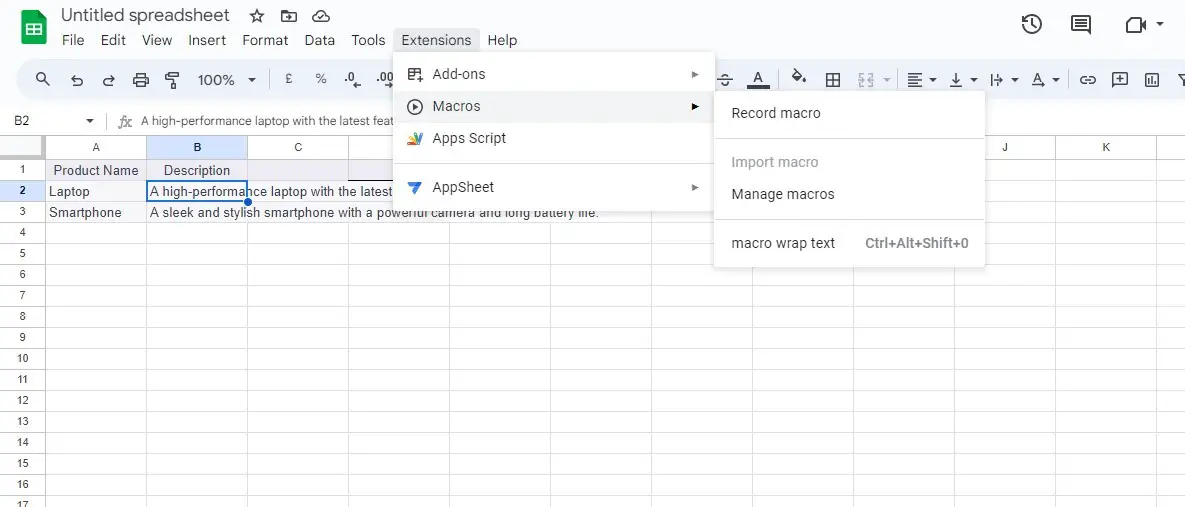
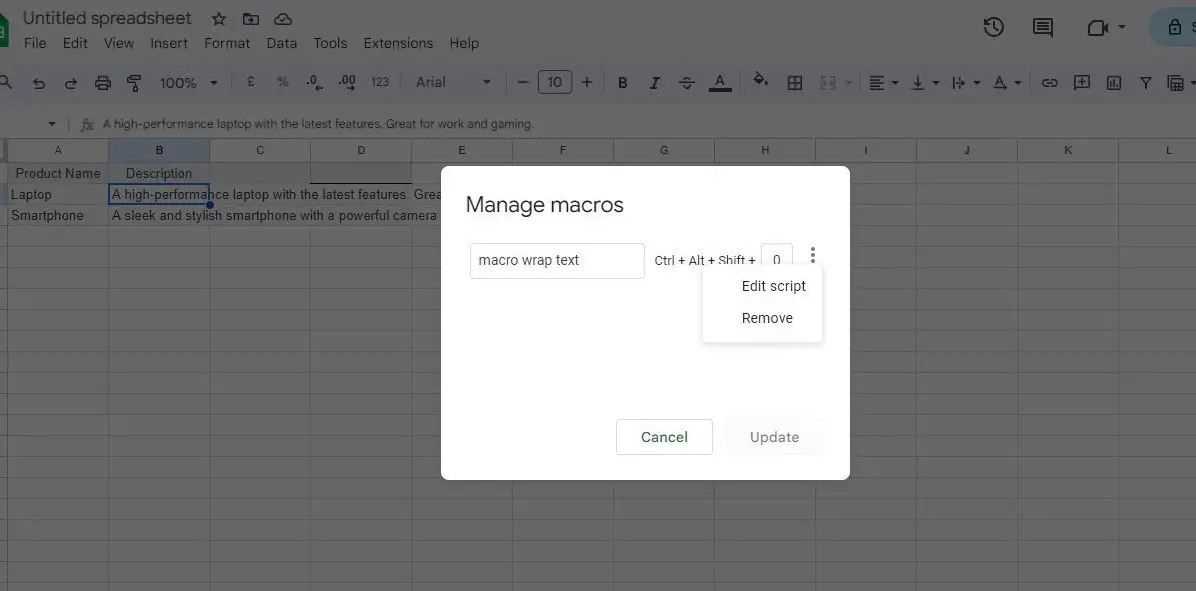
- You can alter the macros script if you know how to code. Go to Extensions > Macros and click Manage macros to edit the macros script.
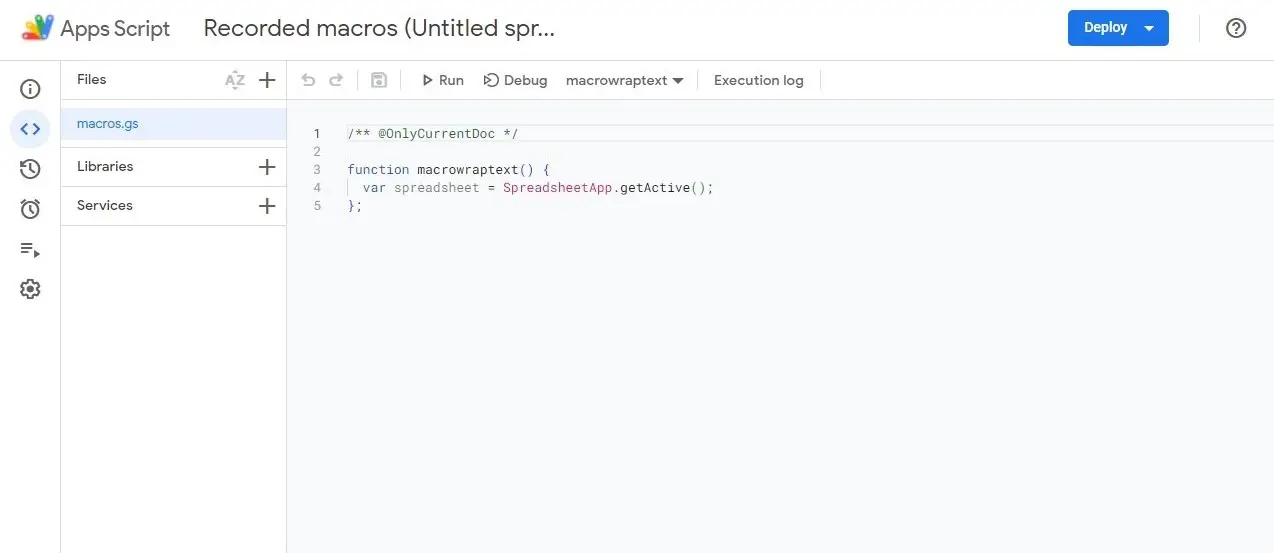
- Select Edit script by clicking the icon with the three vertical dots.
- You will then be sent to Google Apps Script. Select macros. Gs from the Files menu, then change the code as you see fit.
Unwrapping Text in Google Sheets
Unwrapping text is like setting your text free from the confines of a cell. Let’s explore how to do it, along with some tips.
Removing text wrapping in Google Sheets is an easy step to do:
- Click on the cell containing the wrapped text that you want to unwrap. The cell will be highlighted.
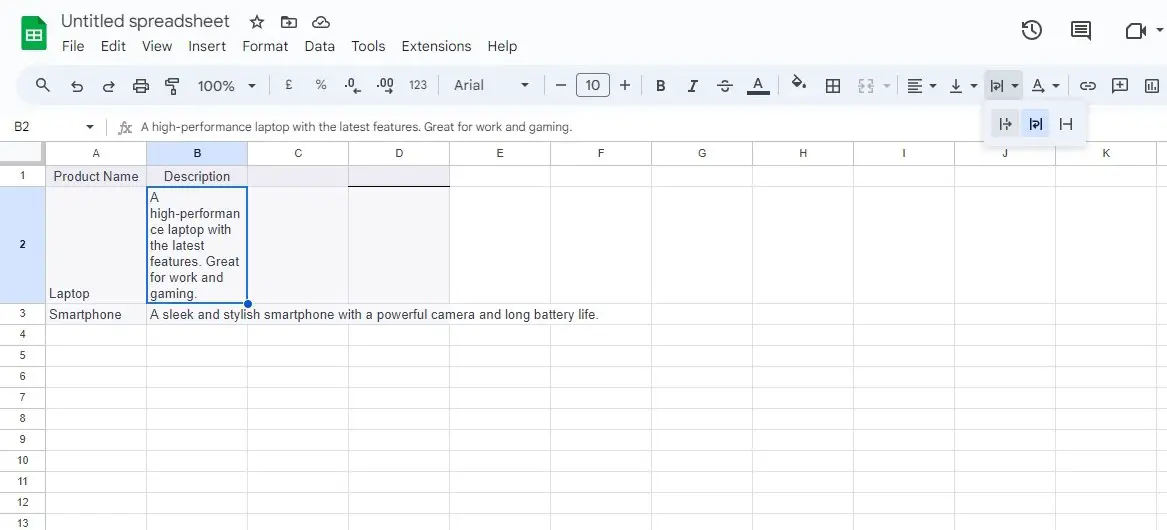
- In the toolbar at the top of the Google Sheets window, locate the “Text wrapping” icon. It looks like a box that has an arrow.
- Click on the icon and select ” Overflow ” from the dropdown menu.” This option will remove text wrapping.
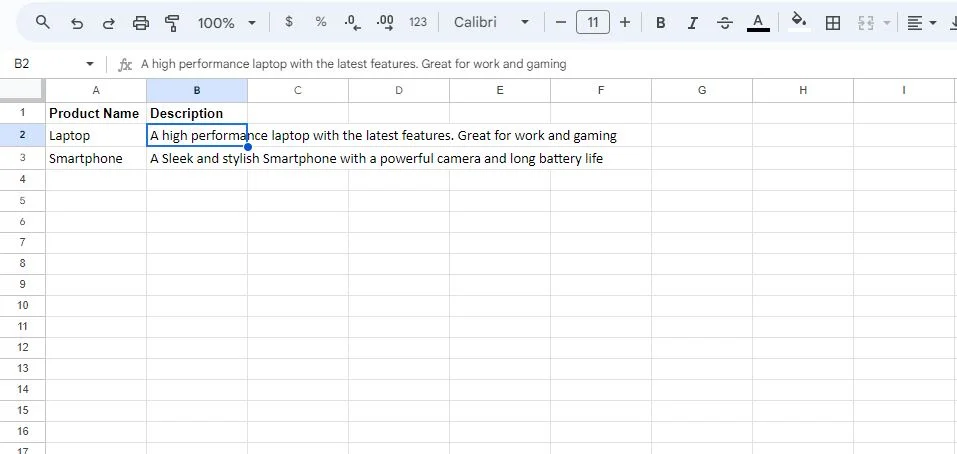
- Check the selected cell to ensure the text is no longer wrapped and appears as a continuous line.
Tips on Managing Wrapped and Unwrapped Text
Here are some tips we provided for you to manage wrapped and unwrapped text:
- Decide whether you want to use text wrapping or not throughout your spreadsheet. Consistency makes your spreadsheet look more clean and organized.
- Remember that text wrapping might behave differently if you’ve merged cells, so be cautious when unmerging.
- After unwrapping the text, review your spreadsheet to ensure it remains easy to read and understand. Adjust cell sizes as you need.
- While text wrapping can be helpful, use it selectively. Only wrap text when it improves the presentation of your data.
Conclusion
For efficient data management, we’ve covered text wrapping and unwrapping in Google Sheets. These skills enhance data presentation editing and optimize spreadsheet use.
Practice these techniques to boost productivity and confidence in Google Sheets. I hope you fully understand how to wrap text in Google Sheets.
With over two decades of experience in writing about Microsoft Excel, Google Sheets, and various other spreadsheet tools, Muhammad Nadeem Salam is your go-to expert for all things data. Since 2004, he has been passionately sharing his knowledge and insights through engaging and informative blog posts, helping countless readers unlock the full potential of their spreadsheet tools.
