Microsoft Excel is a reliable resource for millions of professionals worldwide in the ever-evolving field of data management. But what if we told you that if you learned the technique of effortlessly adding months to dates, you could up your Excel game to the next level?
Say goodbye to difficult calculations and hello to a more intelligent and effective way of handling your time-sensitive data. Because we have developed a new technique, add month to date in Excel for your help. Let’s dive in!
How to Add Months to Date in Excel?
The EDATE function in Excel allows you to add several months to date in Excel. When performing financial modeling and changing periods, this can be quite helpful.
For instance, you can extend the start date by one month to have a monthly financial model. You can extend the start date by three months if you desire a quarterly financial model modeling.
Formula to Add Months to Date in Excel
=EDATE (start date, number of months)
Example of Adding Month to a Date in Excel
Here are a few steps to follow to add months to date Excel:
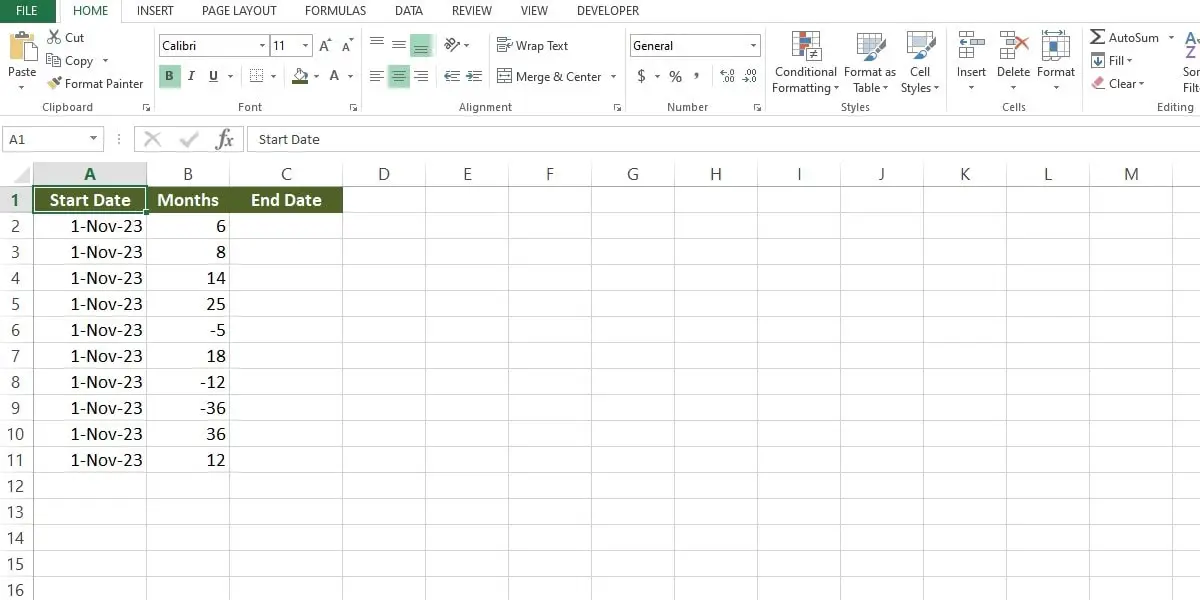
Step 1: You must input the date you want to add months. For instance, you could type the date into cell A1 and “number of months” (you want to add to cell A1) in B1.
Step 2: Use the EDATE function to accomplish this.
=EDATE (start_date, months)
- Start date: The date you desire to get a specific number of months before or after is the start date.
- Amount of time before or after the start date expressed in months.
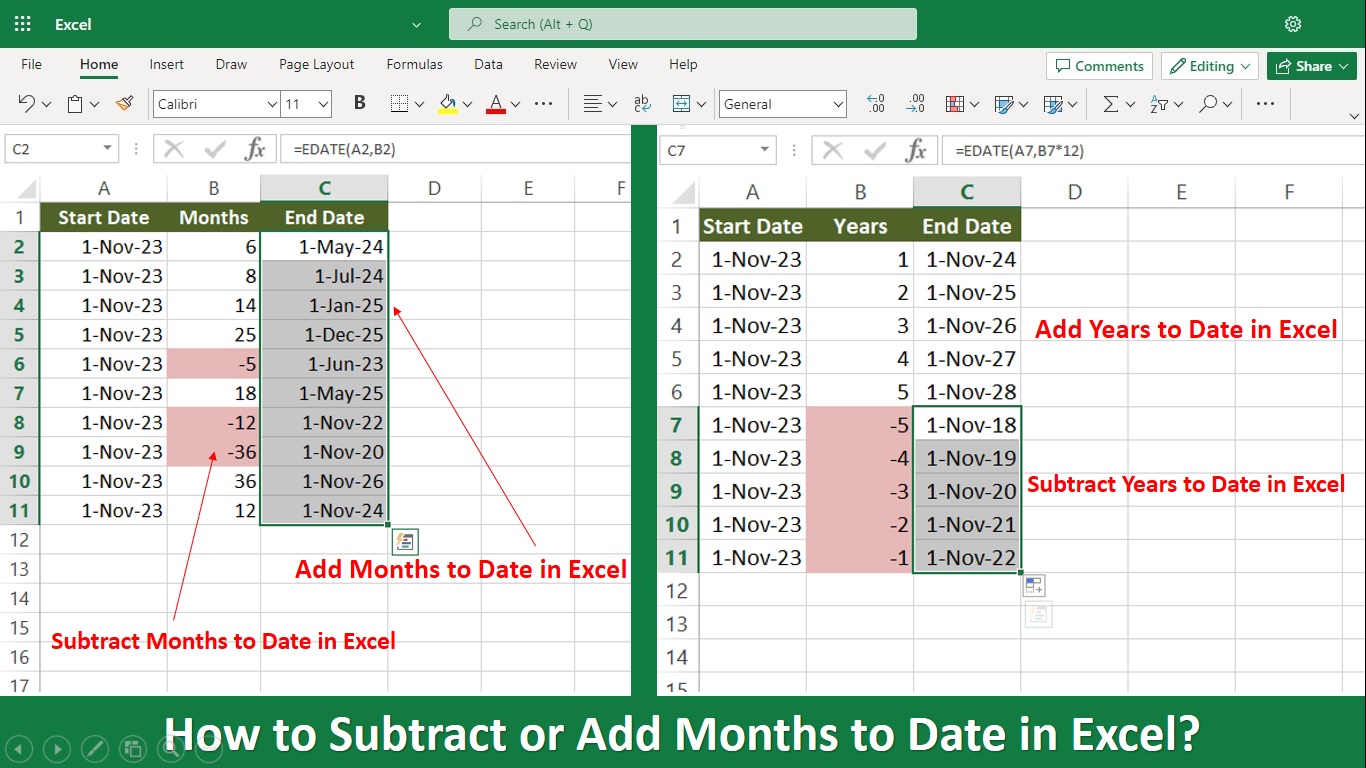
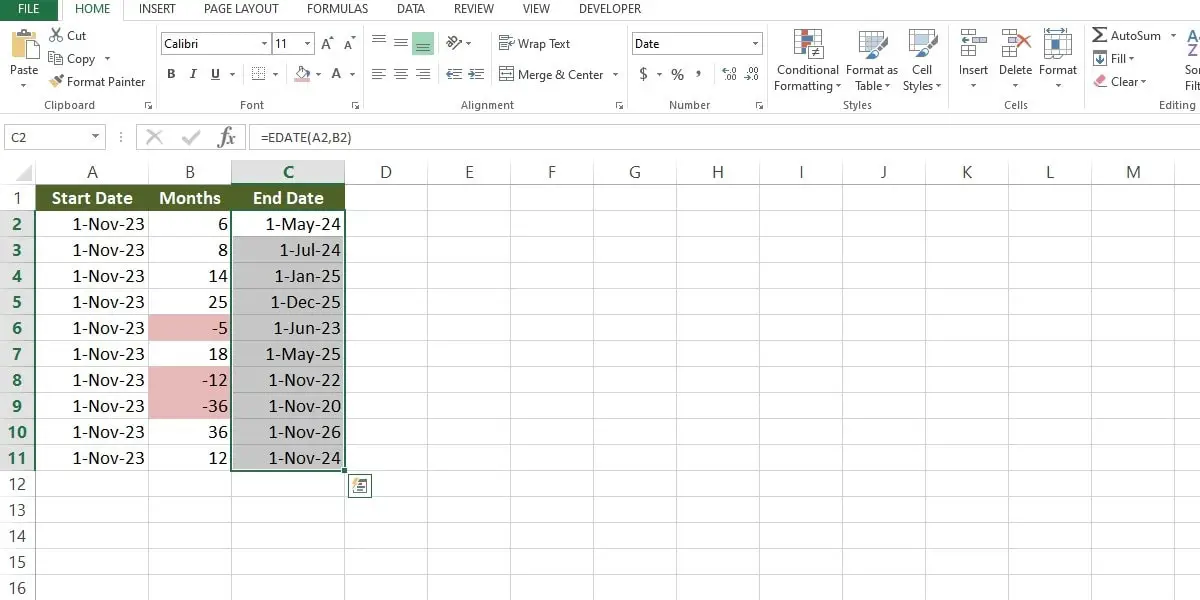
Step 3: If we want to add six months (cell B2) to Nov 01, 2023 (A2) and get the result in cell C2.
The formula in C2 like:
=EDATE (A2, B2)
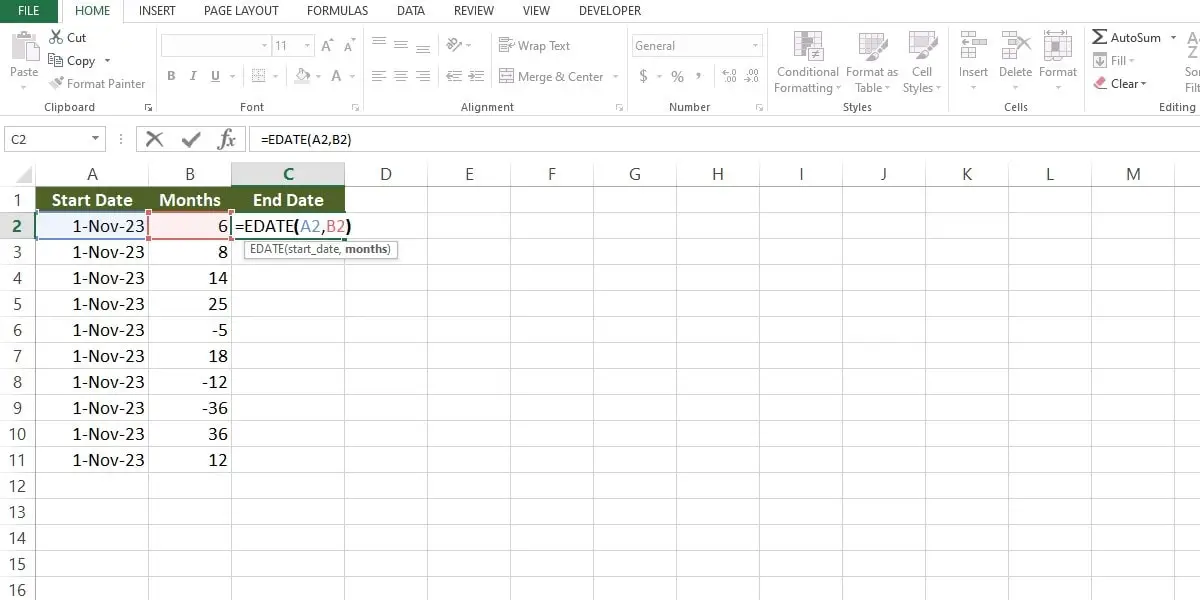
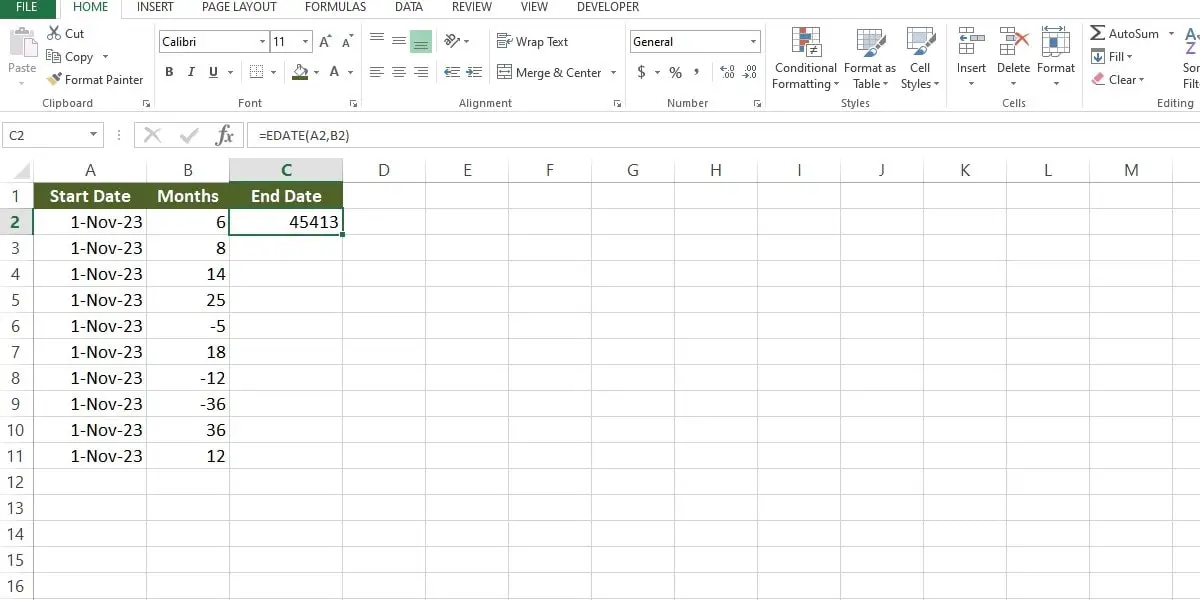
Step 4: Then press enter to show results. The result will be a number. Don’t worry. It is a date but the cell is not formatted to Date Format.
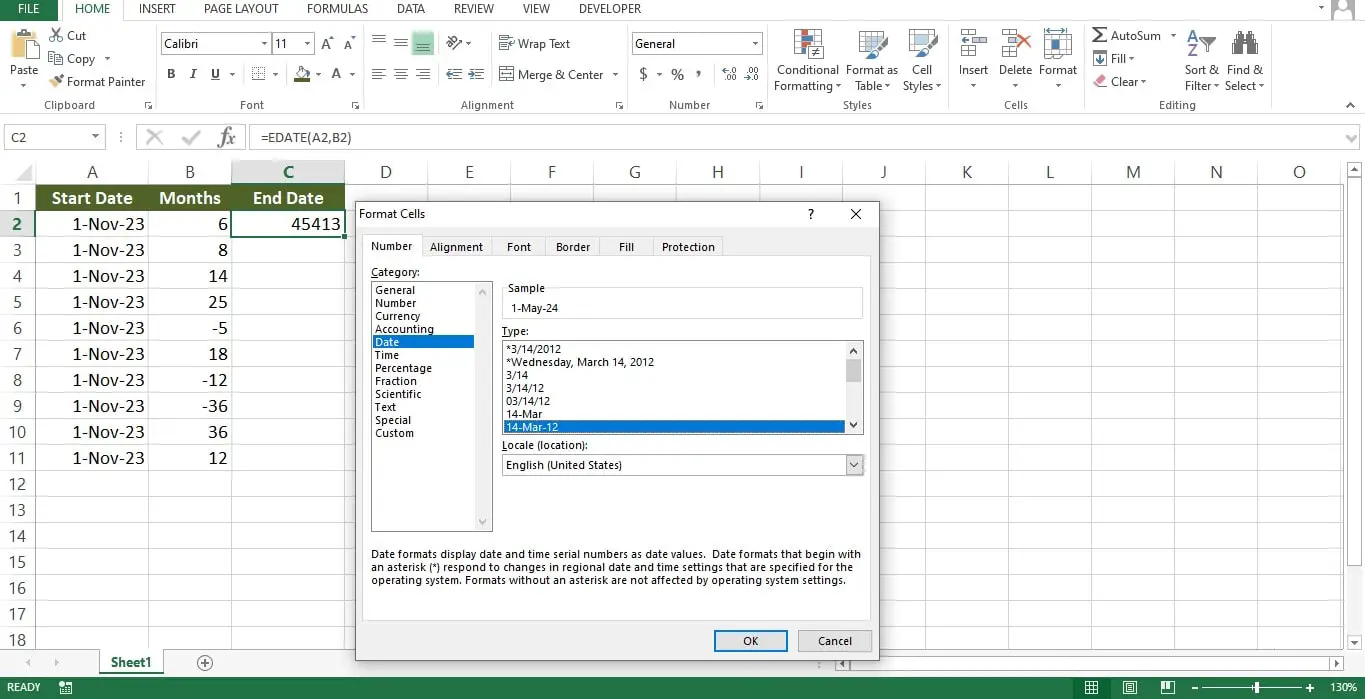
Step 5: Right-click on the cell and go to Format Cells, on clicking it, you will get the following window. Select the date format as shown in the image below.
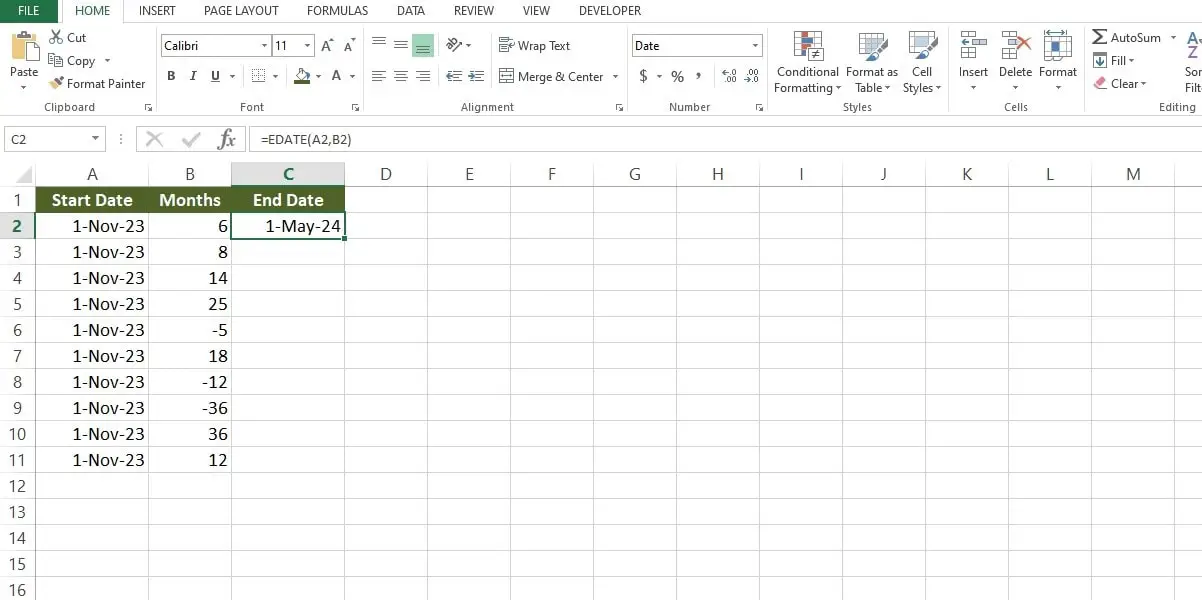
The result is Nov 01, 2023, and after adding 6 months will be May 01, 2024, as shown in the image below.
How to Subtract Months to Date in Excel?
If you want to subtract the month, you just input the negative integer and add the formula, and the result will come.
How to Add Years to a Date in Excel?
Here are steps to add years to a date:
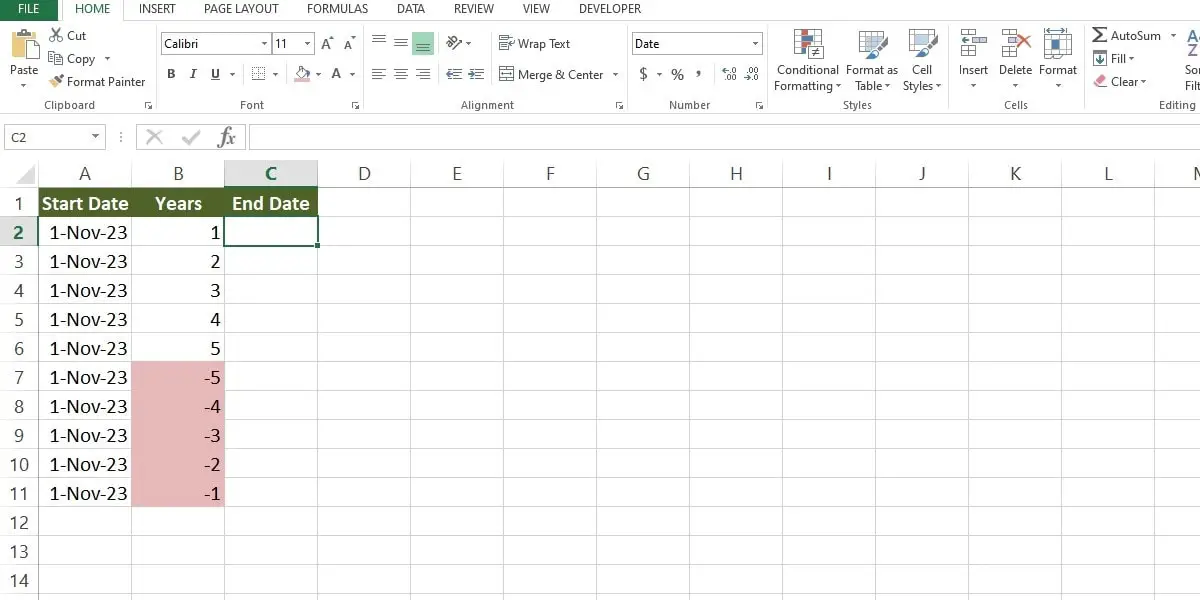
Step 1: Consider the following dataset, where you want to add the number of years in column B to the dates in column A.
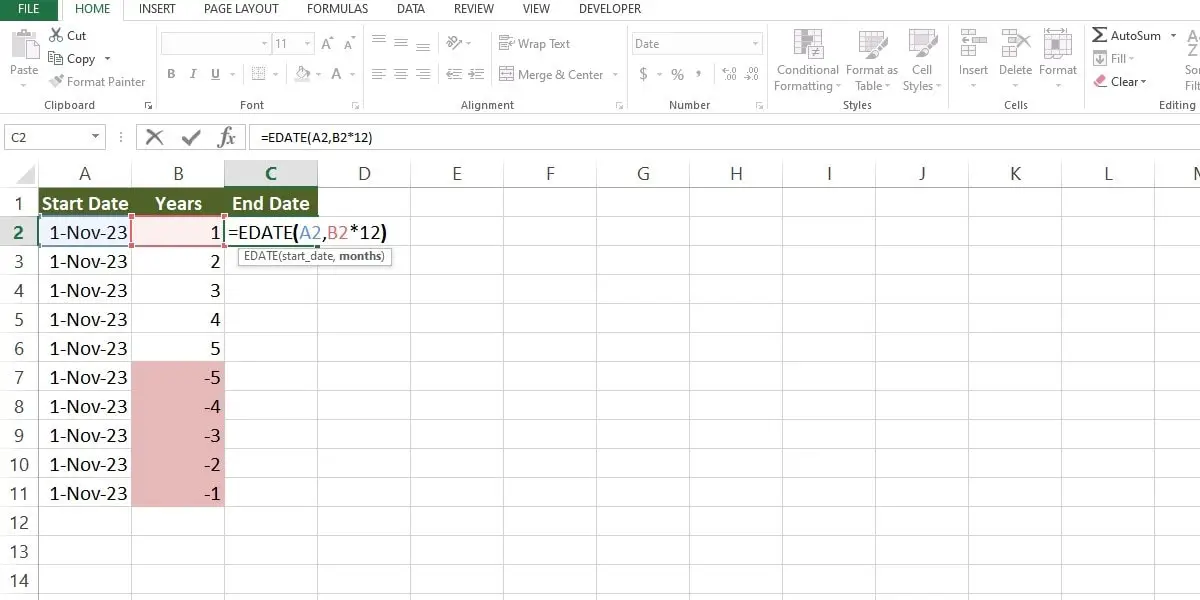
Step 2: Formula will be used:
=EDATE(A2, B2*12)
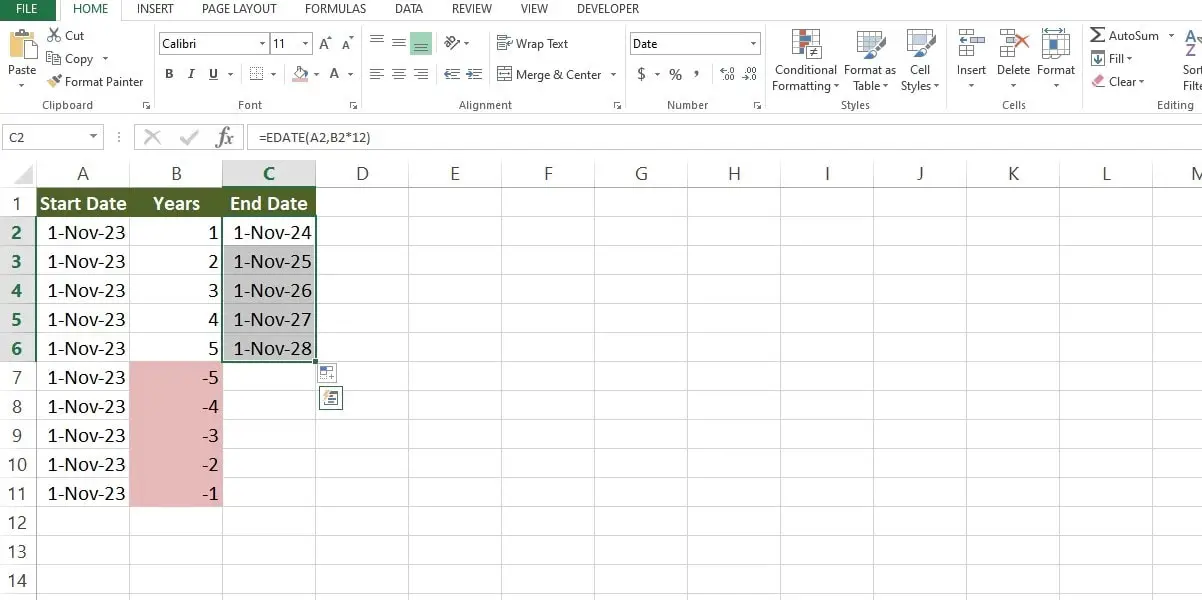
Step 3: Press enter, and the result will be shown. The result in C2 is Nov 01, 2024, one year after Nov 01, 2023. Drag the formula to get the result on the remaining cells as well.
How to Add 2 Years to a Date in Excel?
To add 2 years to a date in Excel, the following formula will be used:
=EDATE(A3, 24)
Where A3 is the date and 24 represents 2 years. Alternatively, you can use the following formula:
=EDATE(A3, B3*12)
Where A3 is the date and B3 represents the value of 2 years.
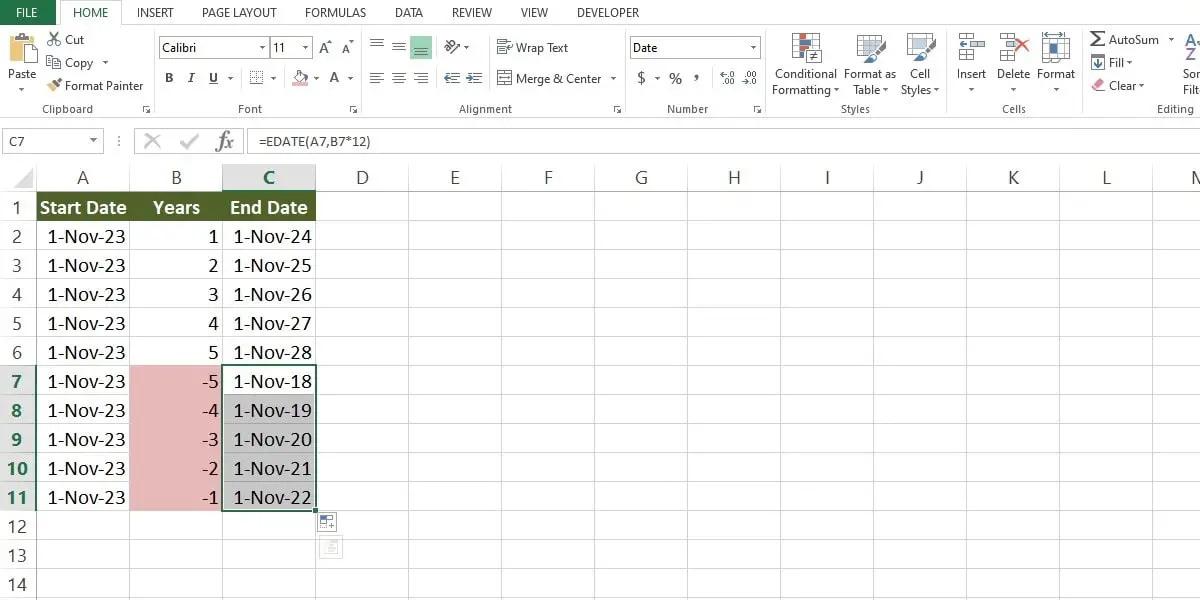
How to Subtract Years to Date in Excel?
If you want to subtract the years to Date in Excel, you just input the negative integer and add the same formula, you will get the result.
Conclusion
I hope you understand better now about adding the month to date. Using the fundamental concepts, Excel functions, and best practices outlined in this article, you can calculate complex dates confidently.
FAQs:
How do I add months to a specific date in Excel?
You can use the following formula to add months to a specific date in Excel.
=EDATE (start date, number of months)
How do I add months between two dates in Excel?
You can use the following formula to add months between two dates in Excel.
=MONTH(End_Date)-MONTH(Start_Date)+12*(YEAR(End_Date)-YEAR(Start_Date))
With over two decades of experience in writing about Microsoft Excel, Google Sheets, and various other spreadsheet tools, Muhammad Nadeem Salam is your go-to expert for all things data. Since 2004, he has been passionately sharing his knowledge and insights through engaging and informative blog posts, helping countless readers unlock the full potential of their spreadsheet tools.
