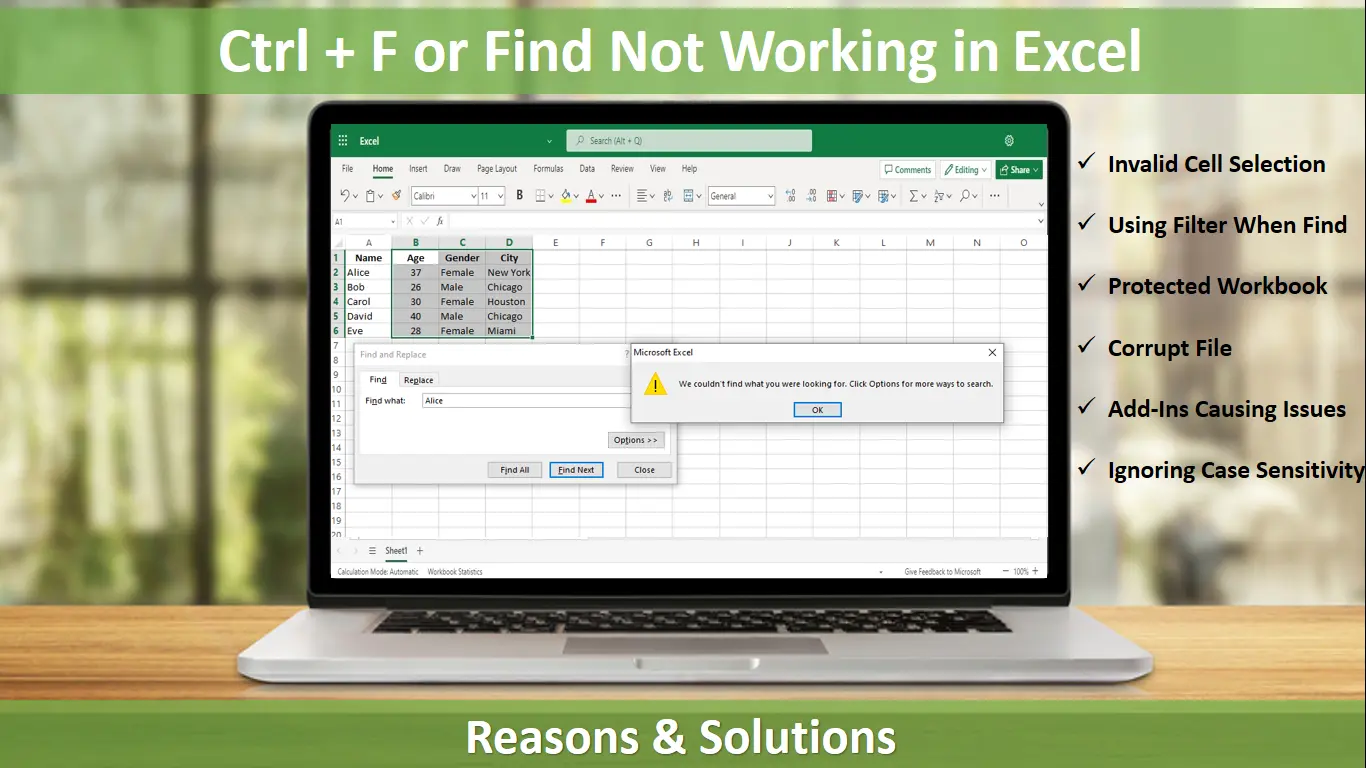
Microsoft Excel provides plenty of useful features for managing and analyzing complex data. When you approach a reliable “Find” tool for assistance, it plays hide-and-seek with your data. However, users may encounter frustration when the “Ctrl + F” or “Find” function does not work in Excel or seems to misbehave.
You can save a lot of time and work, but occasionally, it doesn’t function, which delays the completion of your work. You become frustrated and ask, “Why is Excel’s ‘Find’ not working as it should?”
This problem typically results from the protection function or filter in Microsoft Excel. This blog serves as a comprehensive guide, offering insights and solutions to fix the “Find” function when it’s not working as expected.
Join us as we explore the potential issues and provide step-by-step solutions to ensure a seamless experience with Excel’s powerful search feature. Let’s dive in!
Reasons & Tips to Fix “Find Not Working in Excel”
We’ve provided helpful tips for resolving issues with Find in Microsoft Excel. The following tips are:
-
Method 1: Make Sure the Correct Cells are Selected
Make sure you are first searching inside the proper range of cells. The notice “Microsoft Excel cannot find the data you’re searching for” will appear if you have chosen the incorrect cells, preventing Excel from finding the data you’re looking for.
- Step 1: You can start by opening the Excel worksheet. To open the Find and Replace in Excel dialogue, highlight the cells you wish to search for and click the Ctrl + F keyboard shortcut.
- Step 2: Enter the text or number you’re looking for in the Excel search function box.
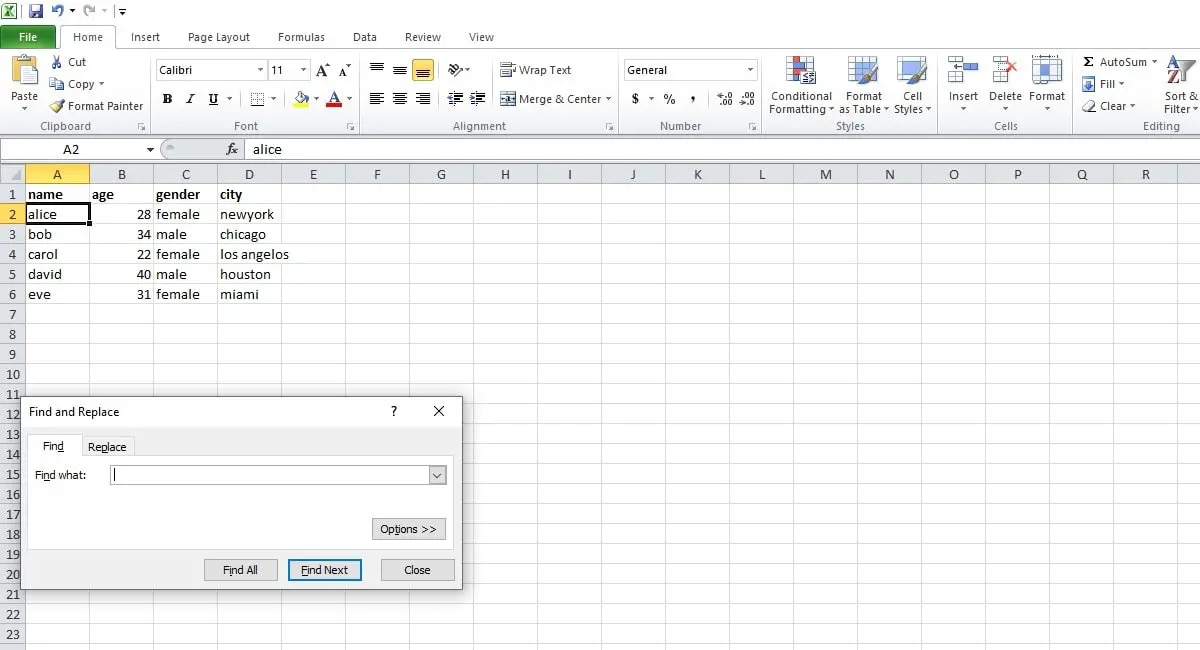
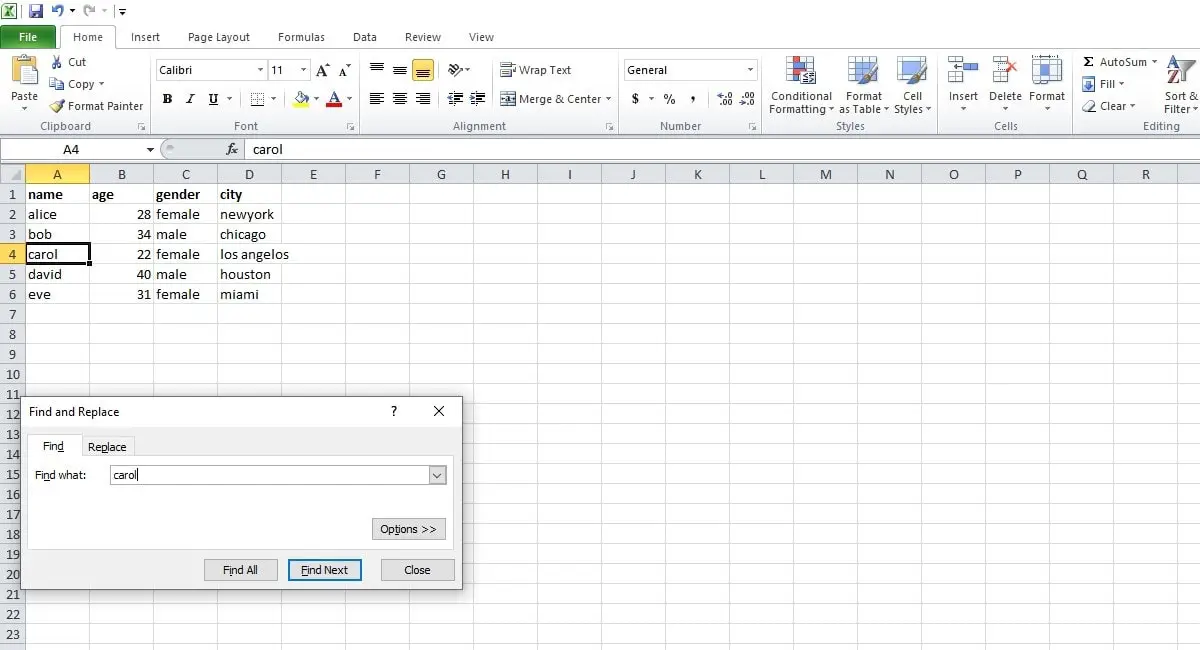
- Step 3: Tap on ‘find all’ or ‘find next.’
-
Method 2: Turn off Filtering for Cells
Excel filters are excellent for removing extraneous data from tables so you can concentrate on the information you want to analyze. If it is buried within a filtered list, Microsoft Excel cannot find the text or number you are looking for.
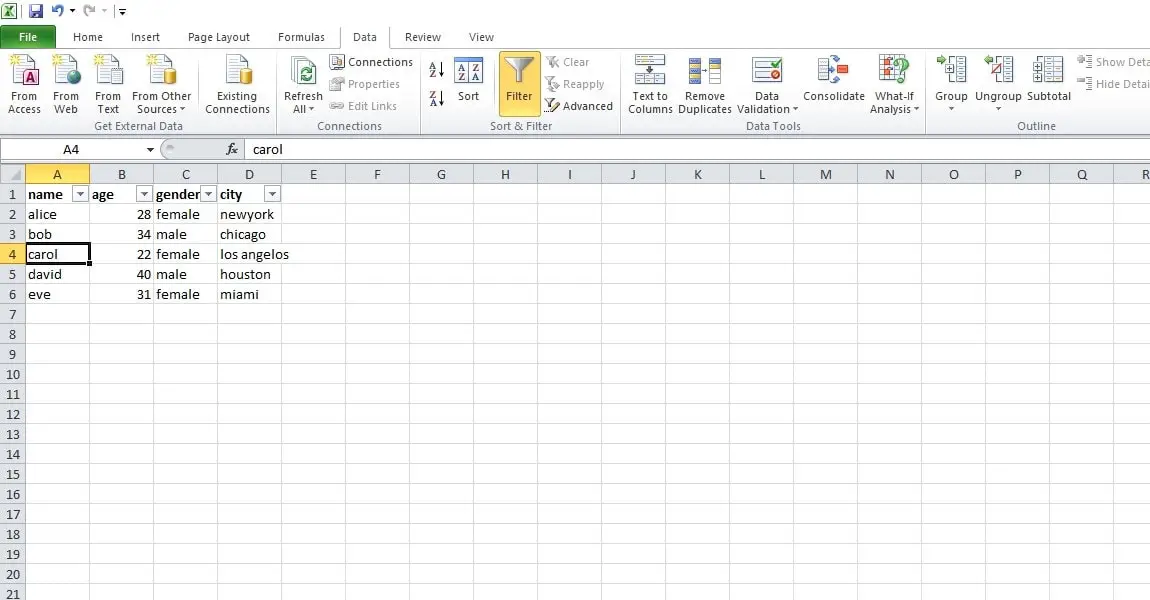
Excel’s cell filtering might be turned off to determine if Find functions properly.
To turn off the filter, select the Filter option on the Data tab of a Microsoft Excel spreadsheet. Then, attempt to Find and replace Excel once more.
-
Method 3:Unprotect Excel Worksheet
Excel’s worksheet may be protected if you’re experiencing trouble applying Find to change text or numbers. It would be best to unprotect the Excel worksheet using the instructions below to prevent interruptions.
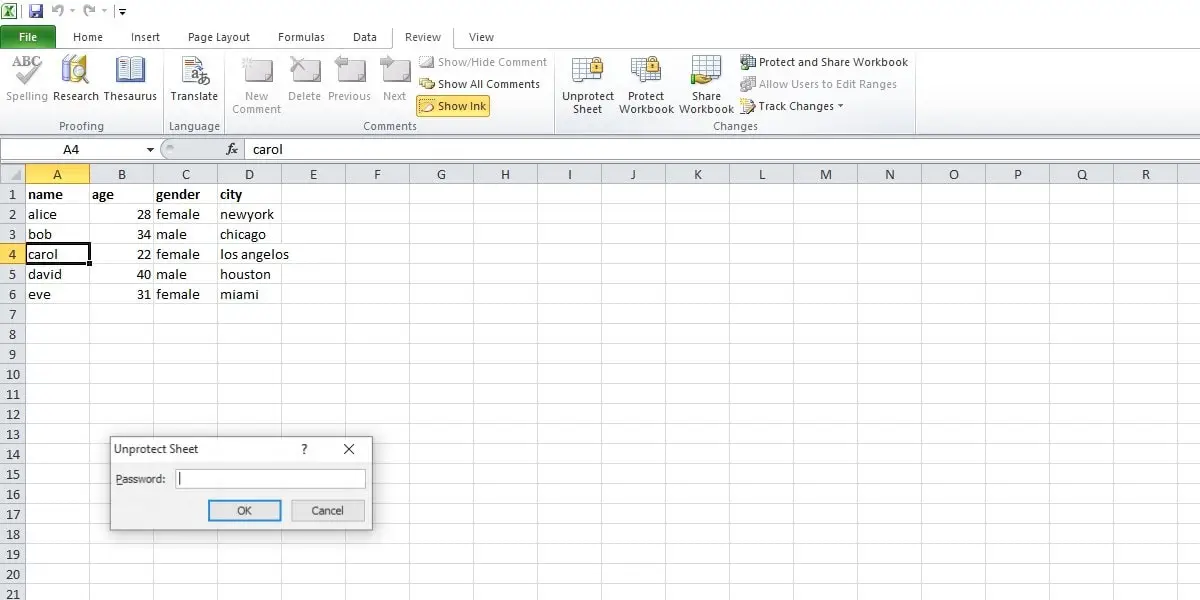
- Step 1: Tap on the Review tab at the top of an Excel spreadsheet once it is open.
- Step 2: Select Unprotect Sheet, and then when prompted, enter the password.
-
Method 4: Repair Excel Workbook
A repair option in Microsoft Excel may be used to find and address workbook issues. Try repairing it if you have obstacles with Find and Replace only in a single Excel workbook.
- Step 1: Open a Microsoft Excel spreadsheet.
- Step 2: Now, click the File menu in the top-right corner.
- Step 3: Then, click the Browse option after choosing Open from the left sidebar. Choose your Excel file by browsing.
- Step 4: To choose the Open and Repair option, click the downward pointing arrow next to Open.
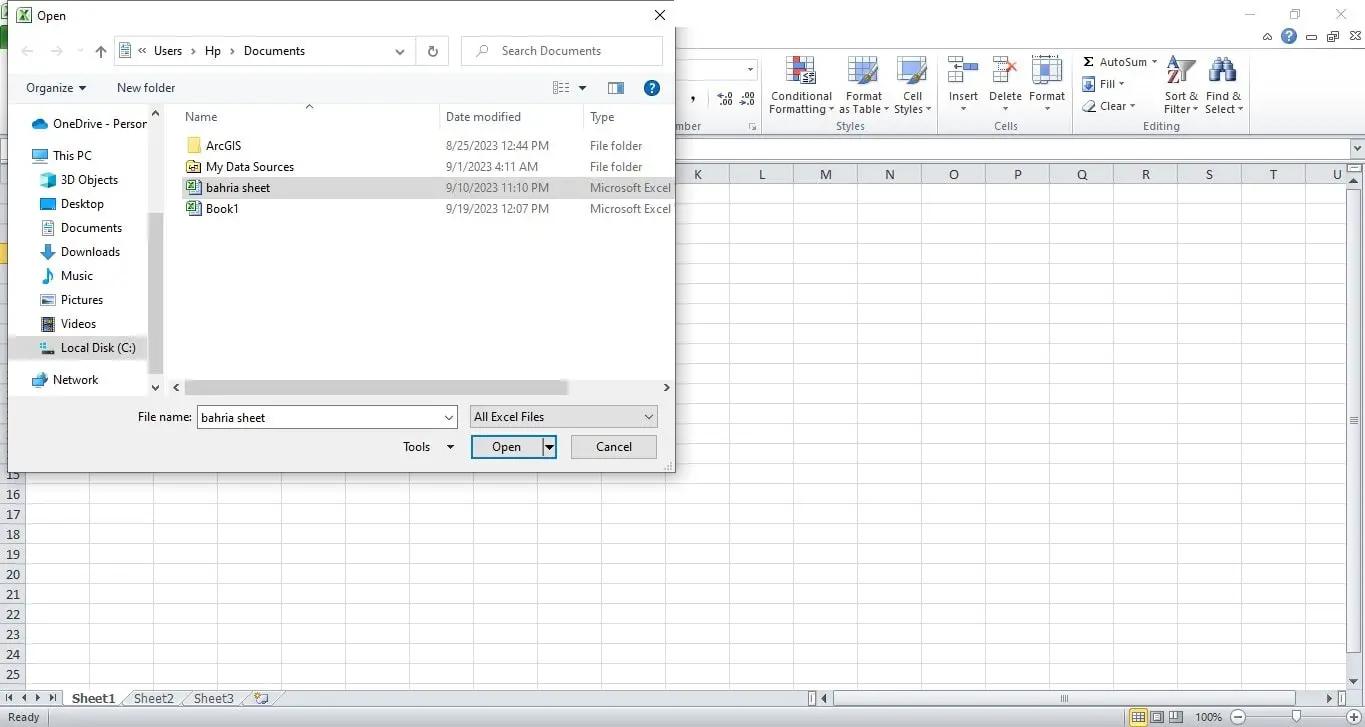
- Step 5: Microsoft Excel will open your file following file repair. Try using the spreadsheet’s Find and Replace tool after that.
Now, let’s learn the next method to fix the find feature not working in Excel.
-
Method 5: Start Excel in Safe Mode and Turn Off Add-Ins
We can use Microsoft Excel in safe mode, which makes it run without any of its add-ins, to test for this possibility.
- Step 1: Use the Windows + R keyboard shortcut to open the Run dialogue.
- Step 2: Type “Excel-safe” and press “OK” to open the Microsoft Excel in safe mode.

- Step 2: After Excel enters safe mode, open your workbook and try to use Find and Replace.
Now, let’s learn the next method to fix if Ctrl+F is not working in Excel.
-
Method 6: Use the Microsoft Office Repair Tool
For most Office program problems, Microsoft Office includes a special tool that you can use. This article will explain how to utilize that tool to resolve the Excel Find not working problem.
- Step 1: Open the Run tool by pressing Win + R, entering “Control Panel” in the search field, and then clicking OK. Use alternative methods to open the Windows Control Panel if this one doesn’t work.
- Step 2: Select the option to uninstall a program.
- Step 3: Select Change with a right-click on Microsoft Office.

- Step 4: After choosing Quick Repair, select the Repair button.
Now, let’s discuss the last method to fix the find feature not working in Excel.
-
Method 7: Case Sensitivity
One of the most common reasons for Excel’s find function not working as expected is due to case sensitivity. Microsoft Excel’s “Find” function is case-sensitive by default, so ensure your search term matches the case of the data you are looking for.
-
Method 8: Seek Online Help
There are a tonne of solutions on the online forums and Excel community. Be bold and ask for guidance from other Excel users who may have run through related problems.
Conclusion
Excel’s “Find” feature is crucial for managing data, yet errors can happen. With these tips, you can get over “Find” problems and resume successfully locating your data. Always remember that Excel’s community is always available to help you on your path to spreadsheet expertise!
In detail, this article has concluded the topic ‘Find not working in Excel.’
With over two decades of experience in writing about Microsoft Excel, Google Sheets, and various other spreadsheet tools, Muhammad Nadeem Salam is your go-to expert for all things data. Since 2004, he has been passionately sharing his knowledge and insights through engaging and informative blog posts, helping countless readers unlock the full potential of their spreadsheet tools.
