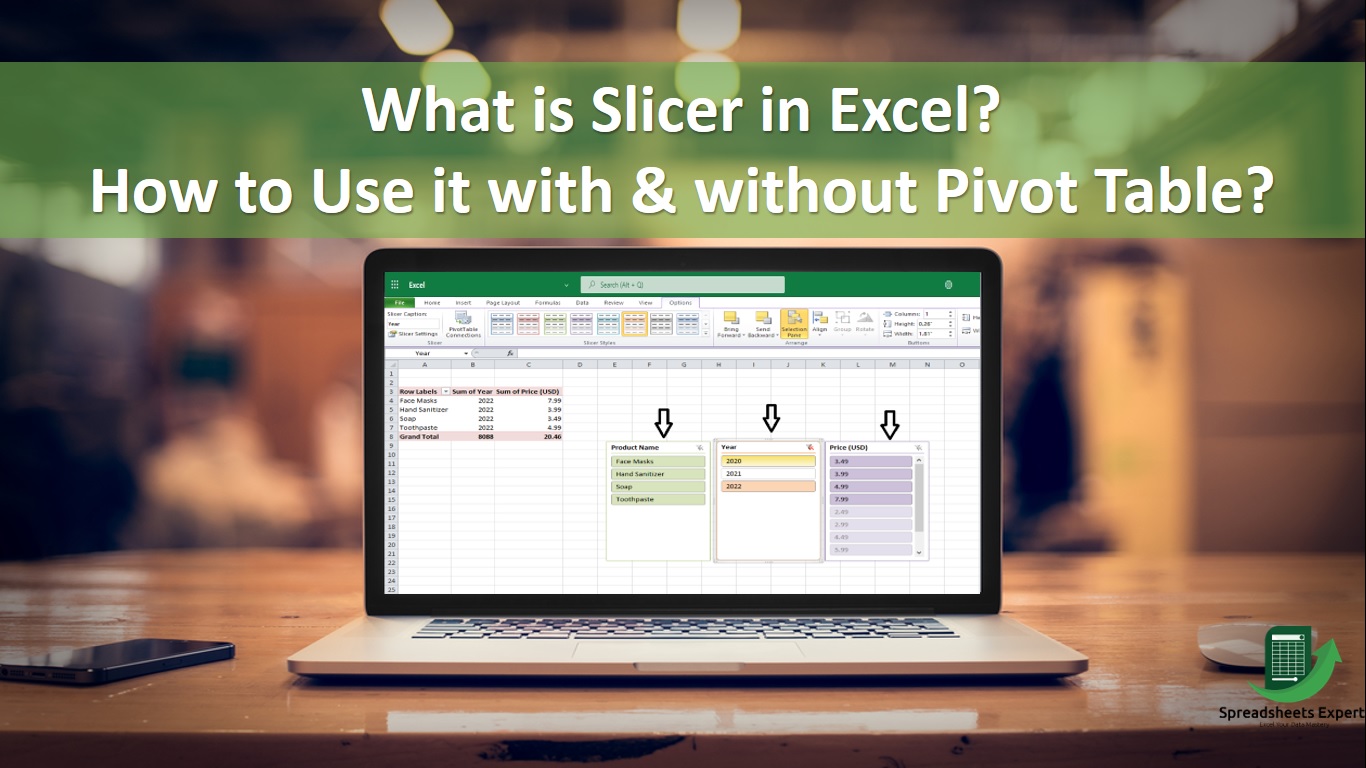
In Microsoft Excel, Slicer is a visual filtering interface that allows you to easily filter and control data displayed in Pivot Table, Pivot Charts, and specific Excel tubes. Slicer provides an interactive way to filter data without opening the filter dropdown or dialogue box.
In this post, you will understand what is Slicer in Excel and how to insert a slicer in Excel using a Pivot Table and without a Pivot Table. You will also learn how to edit and remove it in Excel.
What are Slicers in Excel?
Excel slicers are software filters used in addition to pivot tables or Excel tables to analyze massive amounts of data. Slicers help you easily understand the information that is obtained and displayed on the screen in addition to filtering out the data.
Both Windows and Macintosh operating systems are suitable for Microsoft Excel Slicers.
How to Insert Slicers in Excel Using Pivot Tables?
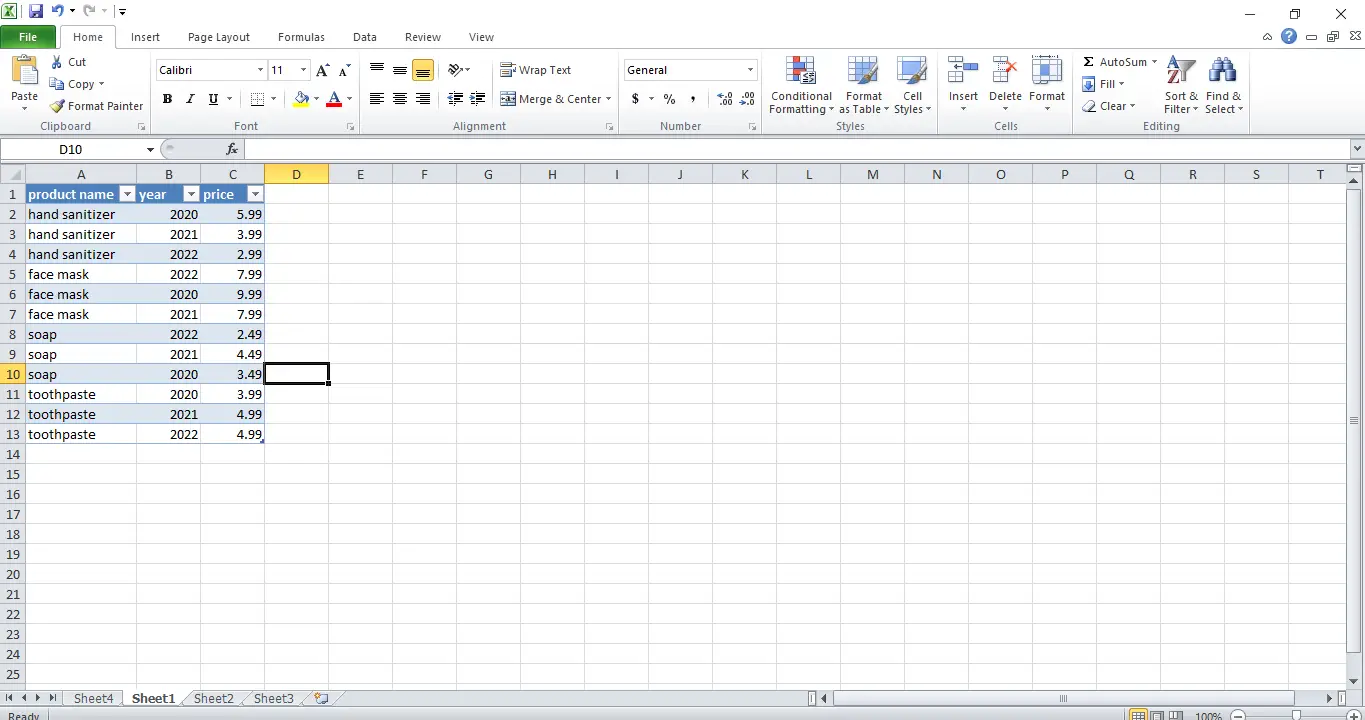
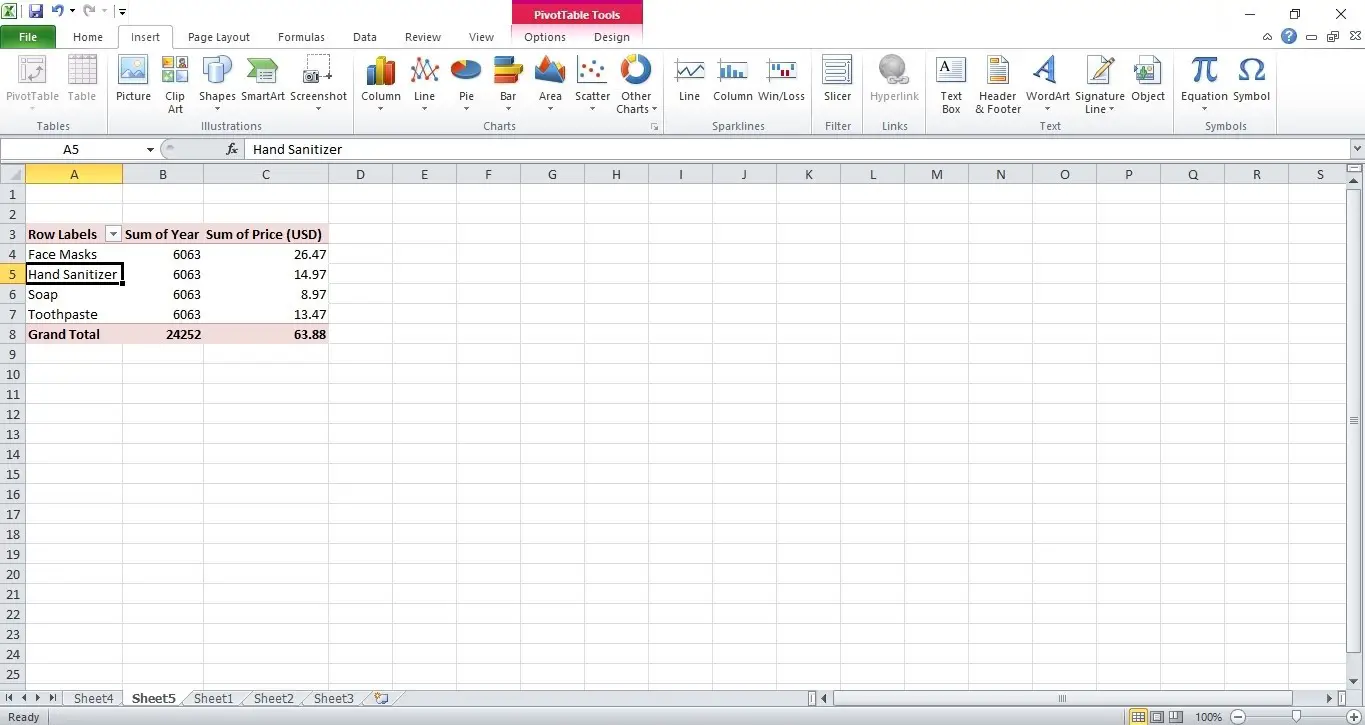
Follow the steps below to insert Slicer in Excel using Pivot Tables. First, we will create a Pivot Table in Excel.
Excel treats your data as a database, making it sometimes challenging to create slicers.
- Select any cell from Excel to create a pivot table.
- Select the pivot table from the insert menu on the toolbar.
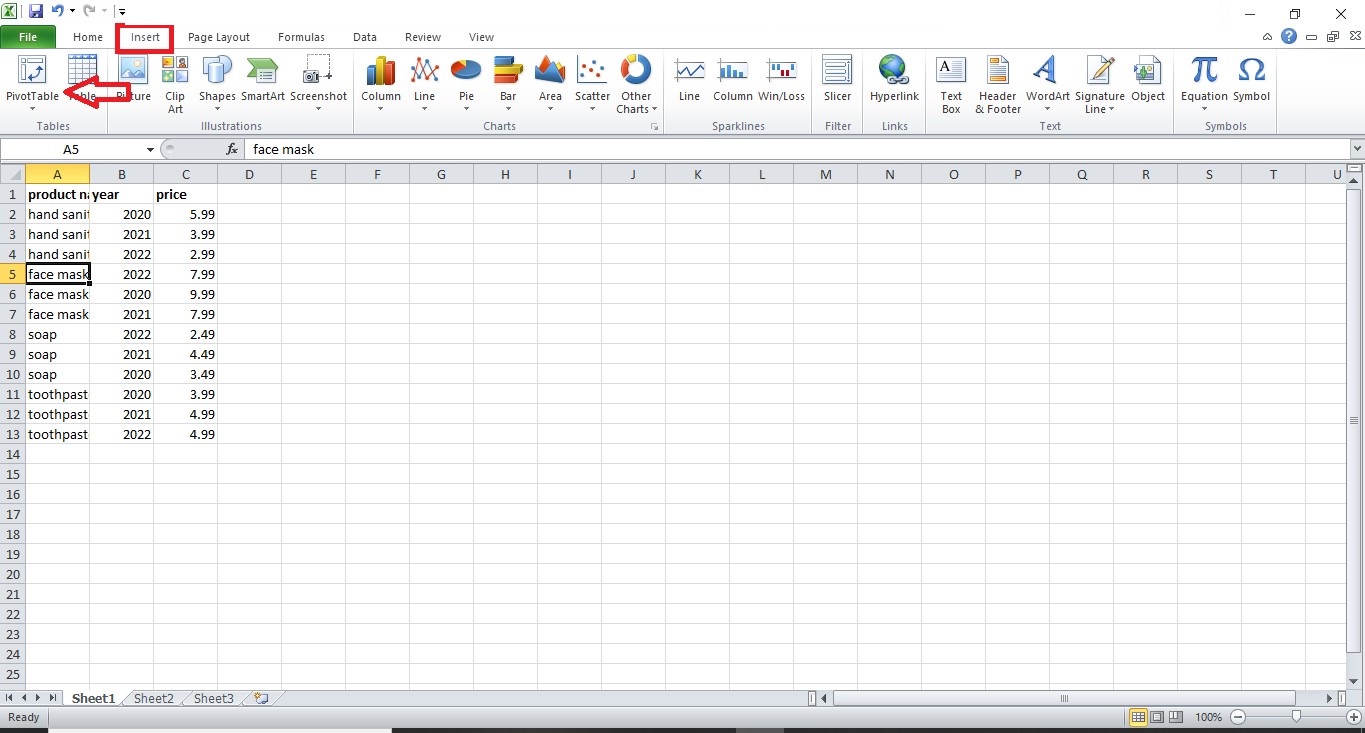
- A new pop-up window will show from which you need to select the data range.
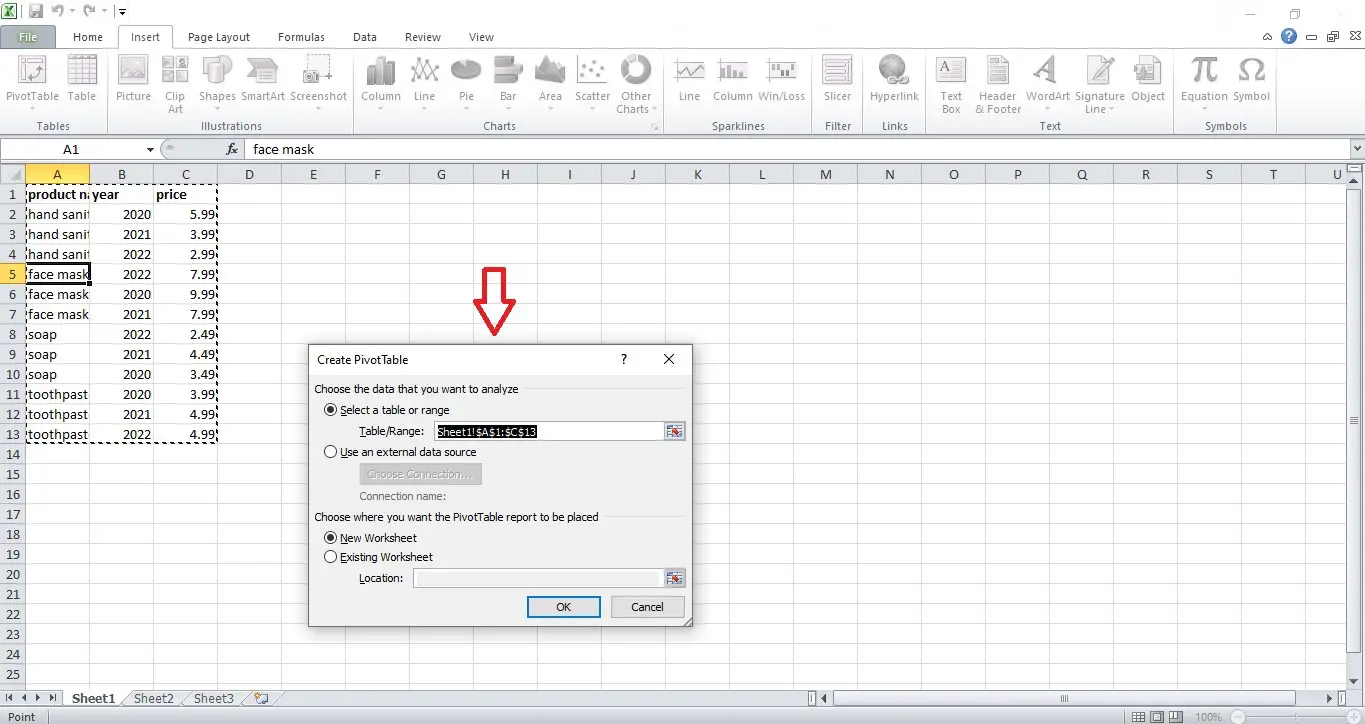
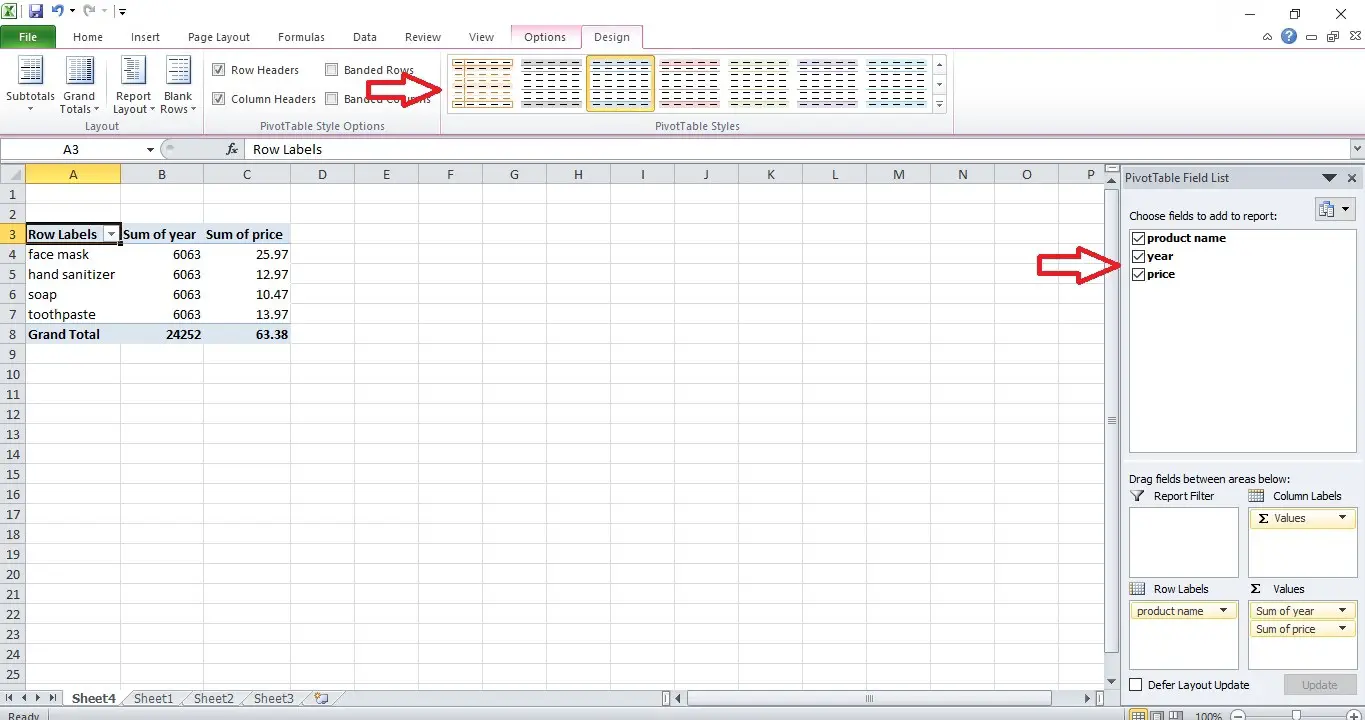
- Now select respective fields to add to the pivot table.
If this method confuses you, try a general Excel table. You can also insert a slicer in Excel without using Pivot tables. Let me show you how to do it.
How to Insert Slicer in Excel without using Pivot Tables?
Follow the steps below to add slicer in Excel without using Pivot Tables
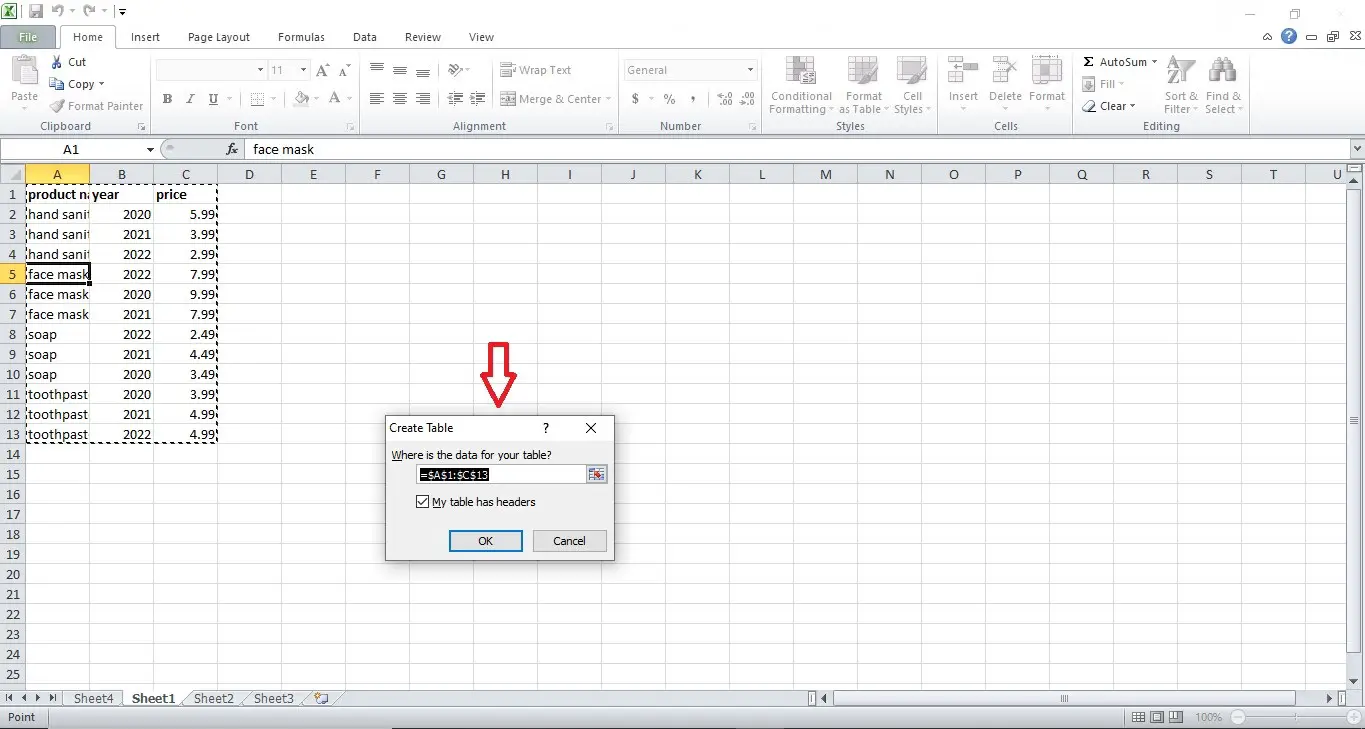
- Choose any cell from the Excel sheet.
- Then press ctrl+t to convert data to table.
- Pick the table range and press OK, as shown in the image below.
- The resultant table will look as shown below.
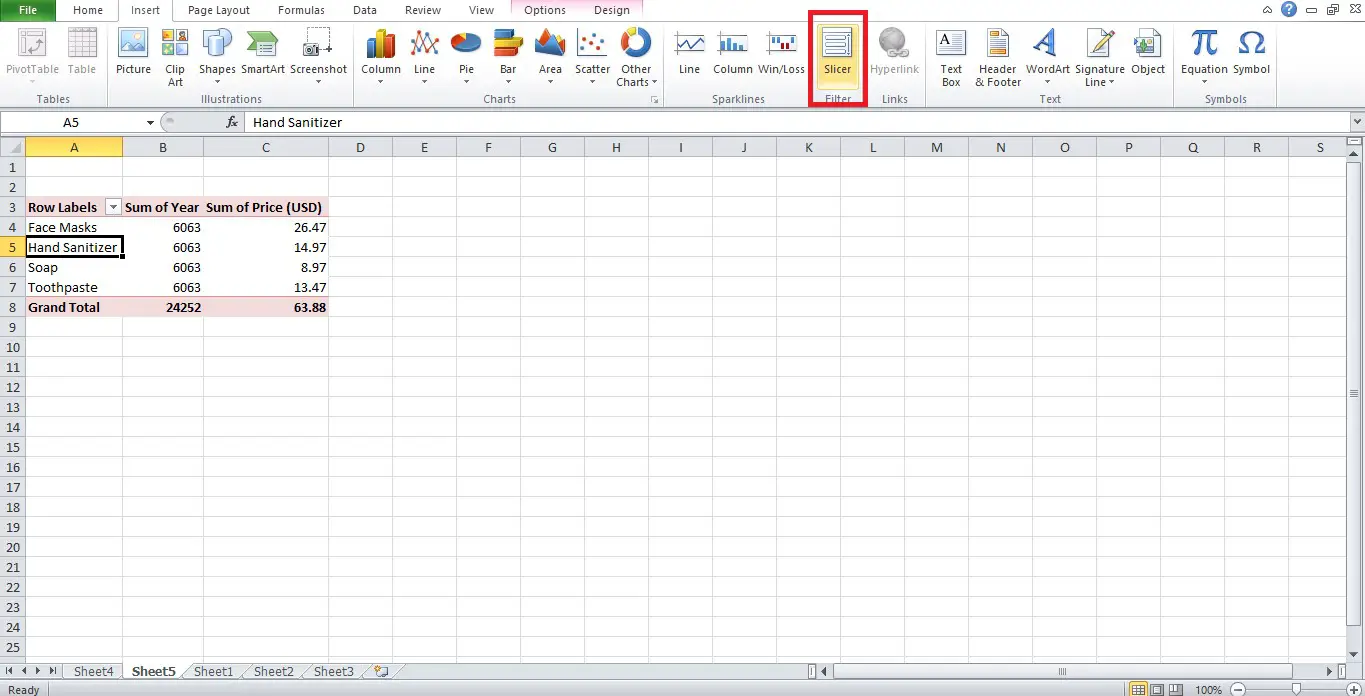
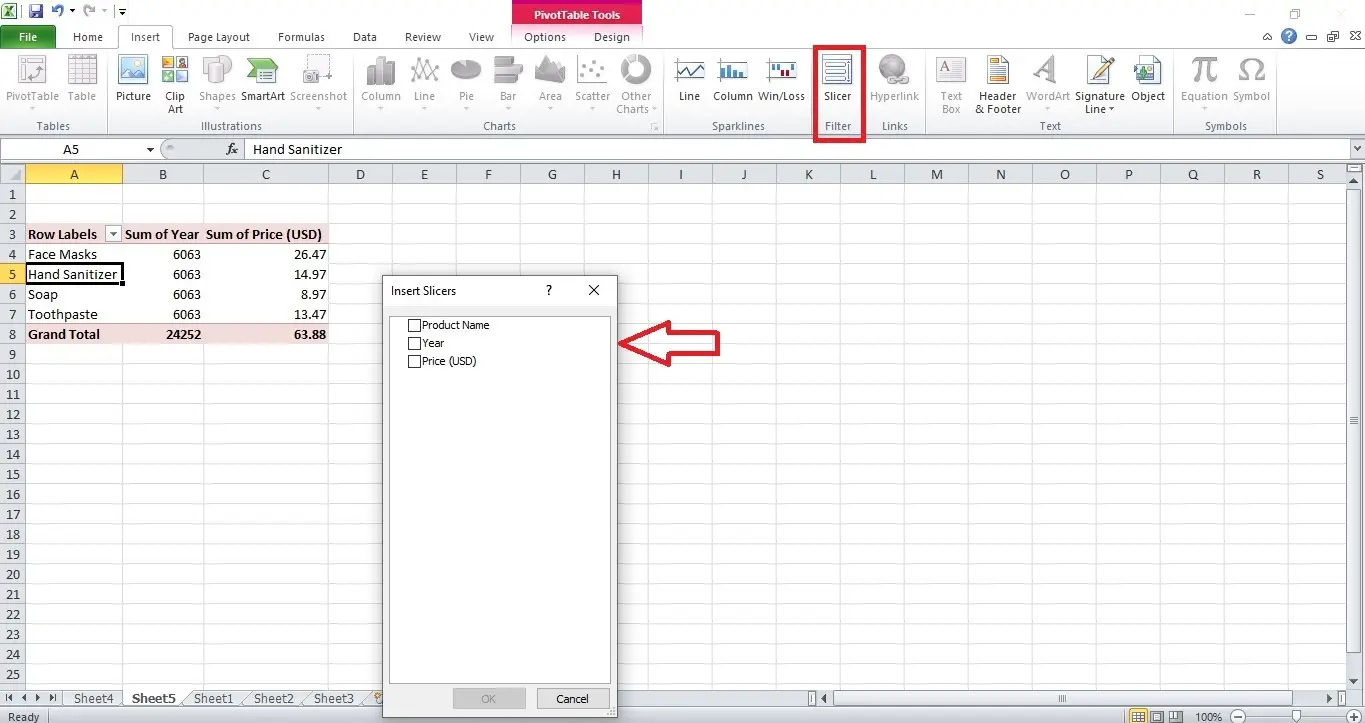
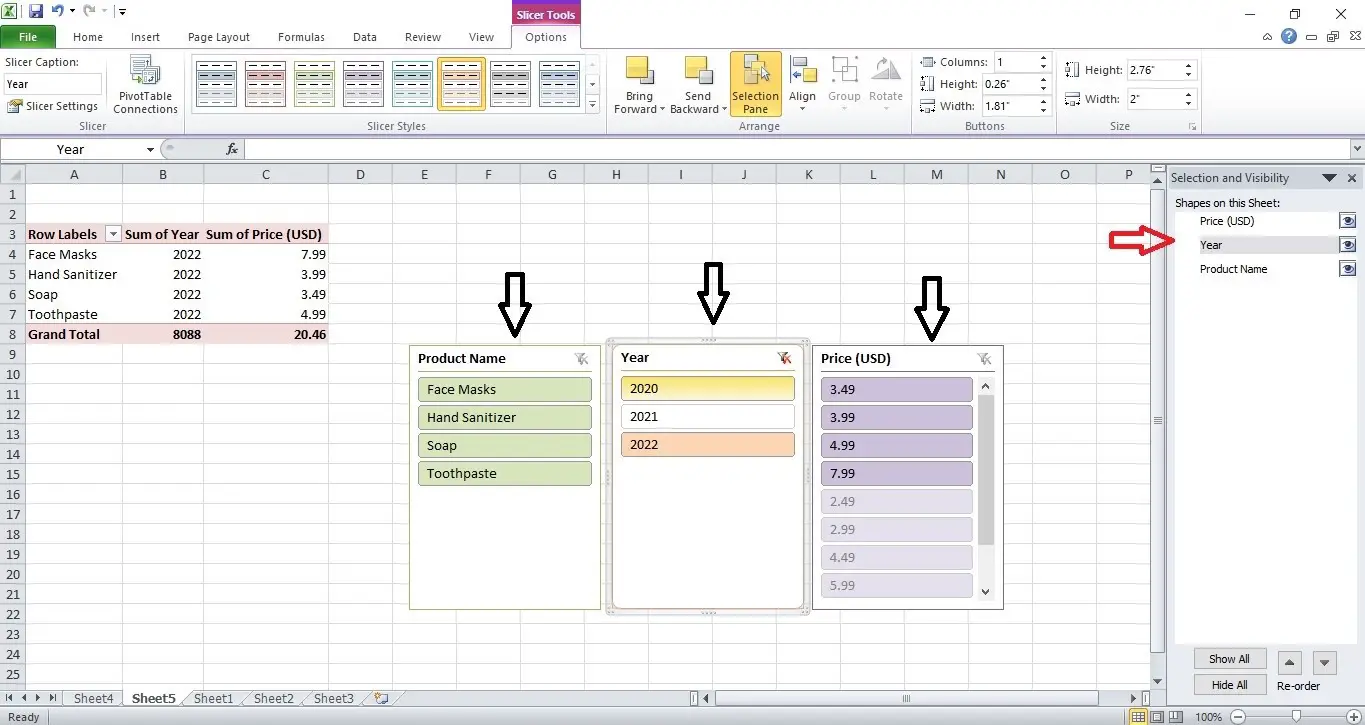
How to Insert Slicer in Excel?
Insert slicers into any cell in the pivot table or Excel table. Put the slicers in now. Slicer insertion is the same as insertion into a pivot table.
- Choose any cell from the table.
- Access the Insert menu item on the toolbar.
- Select insert slicer
- You’ll see a new window asking for some parameters. Make your selections and click “OK.”
- The slicers will be accessible and prepared for use on the screen.
- If you attempt to filter the data using slicers, the outcomes should resemble the one below.
What’s the Difference between a Slicer and a Pivot Table?
You may also need clarification about the difference between the slicer and the pivot table. So, I will provide an informed difference between pivot and slicer;
| Pivot Table Filters | Slicers |
| Due to the abundance of label and value filter options, pivot table filters can be difficult. You must select your criteria based on how they appear in the filtered table. | With slicers, all you have to do is select an option, and the data from the primary table that only meets the specified criteria will be sliced. |
| You can use filter options just on the information in that table. | A slicer can be linked to more than one pivot table or chart. |
Benefits of Using Slicers in Excel
There are many benefits of using Slicers in Excel:
-
Improved data visualization
Slicers provide a user-friendly way to filter and display data in Excel. You can slice and dice their data by selecting different criteria, such as dates, categories, or regions.
Slicer improves the visual representation of the data and enables you to gain more insights.
-
Enhanced interactivity
Slicers make it easy to interact with the data by tapping buttons or dropdown menus. This feature allows for dynamic filtering of data without the need to modify complex formulas or filters manually.
-
Streamlined reporting
By using slicers, you can create customized reports that update automatically based on selected criteria. Instead of having multiple sheets with various filters applied, slicers consolidate all filtering options into one place, simplifying report creation and maintenance.
-
Easy collaboration
Slicers facilitate collaboration by providing a consistent interface for filtering data across different worksheets or dashboards. Each collaborator can use slicers to personalize their view without affecting others’ settings, enabling the sharing and analysis of information.
-
Compatibility with PivotTables
Slicers are particularly useful when working with PivotTables in Excel. They allow you to filter PivotTable results quickly and intuitively, making it easier to analyze summarized data from large datasets.
-
Versatility
Slicers can be applied to various data types, including text, numbers, dates, etc. This versatility allows you to filter and analyze different types of data using a standardized interface.
Slicers can simplify the filtering process and improve your data analysis capabilities, whether you are working with financial data, sales figures, customer information, or any other dataset.
Tips and Best Practices for Working with Slicers in Excel
-
Organizing and managing multiple slicers efficiently
- To ensure clarity, place related slicers in a designated section of your worksheet.
- Make it more straightforward to understand the purpose of slicers by using descriptive names.
- Organize slicers in a logical manner that aligns with users’ expected preferences for filtering data.
-
Utilizing advanced options like syncing slicers across worksheets or workbooks
- To synchronize slicers between worksheets, choose the specific slicer, navigate to the Slicer Tools Options section, and ensure that the “Report Connections” box is checked.
- Consolidate data sources and maintain consistency using Power Query to synchronize slicers across workbooks.
Troubleshooting Common Issues with Slicers in Excel
The following issue has occurred while using Slicer in Excel:
- Verify whether the slicer is situated beyond the visible range of the worksheet.
- Make sure that the slicer is not unintentionally deleted.
- Confirm that the visibility of a slicer is not determined by either the value contained in a cell or conditional formatting.
- If the filters are not functioning as anticipated, verify the slicer settings, including its connected data field.
- Ensure the slicer is not connected to any concealed pivot table or chart.
- To ensure that filter functionality is not adversely affected by abnormalities in the data source, verify the integrity of the data source.
Conclusion
Slicers in Excel accompany pivot tables to quickly filter the desired information from a table. A pivot table offers an all-encompassing overview of the data.
Utilize slicers when you want to specifically focus on and evaluate a specific table column for reviewing, comparing, and analyzing purposes.
Stay updated by regularly checking our blog for more information on creating pivot tables, customizing slicer settings, utilizing lookup functions, and other Excel tips. This post has provided in-depth information on The Ultimate Guide to Using Slicer in Excel.
With over two decades of experience in writing about Microsoft Excel, Google Sheets, and various other spreadsheet tools, Muhammad Nadeem Salam is your go-to expert for all things data. Since 2004, he has been passionately sharing his knowledge and insights through engaging and informative blog posts, helping countless readers unlock the full potential of their spreadsheet tools.